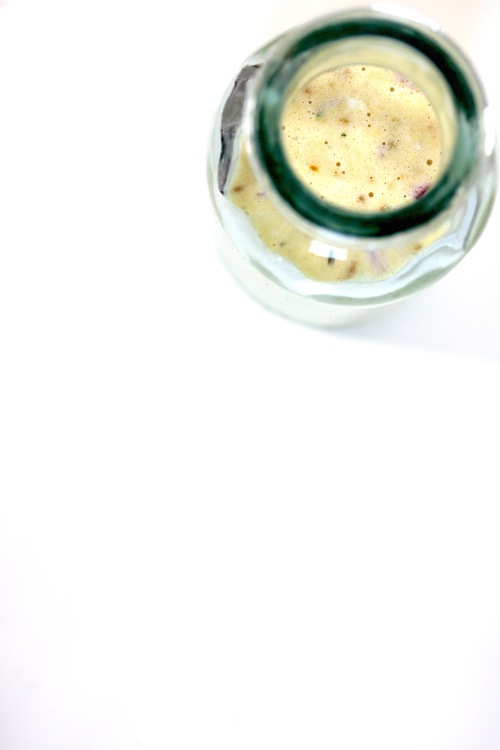
Gazpacho

Gazpacho has always reminded me of that one summer in Spain – of cripplingly hot days, late meals on the terrace, and of thick, creamy gazpacho, made of mostly tomatoes, torn tufts of fluffy white baguette, and masses of olive oil. Every gazpacho that came after that was a disappointment. They were either too chunky, too watery, and always lacking enough salt. All everyone was doing was blending up salad and I wasn’t impressed.
Things needed to change guys. And finally, they did. This summer, in Ardèche, at the local supermarket. France, with their carton-encased gazpacho from the chilled product isle, had all the answers to the questions I didn’t even know I had. It was delicious. And we had it nearly every night. Before you roll your eyes at me and tell me that you’re not a gazpacho sort of person anyway, focus those eyeballs of yours back on my face and listen. I’ve spent the past week trying to recreate that bottled soup at home and I know what its secrets are now. No, not bread. I don’t want blended bread in my gazpacho. I do want bread with it though, whole and crusty, to dip into the soup at the end. No, the silent winner of this recipe is the tinned tomato. The flavour is so much more well rounded than that of fresh (and at times acidic and watery) tomatoes. The second part to this recipe’s success is the comparatively small amount of cucumber. You only need a small hit, enough to add a hint of refreshing watery coolness, not a whole plate of it. Finally, make sure you salt it well. This seems like an obvious instruction, but because the soup is cold, and because people tend to think of it as juice, they tend to under-salt it. So go on, give it a try. You might even love it a little bit.
Gazpacho
Unless you have a vitamix, you will have to do this my way with a hand held blender. Make sure you peel and de-seed the cucumber and the capsicum, because there’s nothing worse than having capsicum skin stuck in your teeth.
And just a suggestion for those still weary of this whole gazpacho business – don’t overdo it when serving it. A small bowl or even glass of it will do. Think of gazpacho as more of an amuse bouche than a full-on course, as something to dip your bread into and whet your appetite before you head on to your main dish.
You can either serve it immediately, at room temperature, or one or two days after making it. Just remember to take it out of the fridge at least half an hour before you intend to serve it.
Enough as an entrée for 4 people
A 400g can of whole plum tomatoes
One red capsicum
One shallot
1/3 of a cucumber
100ml water (or more)
4 – 5 Tbsp extra virgin olive oil
2 tsp red wine vinegar
1 – 1 ½ salt, to taste
To serve
More olive oil, cracked black pepper, chilli flakes, maybe some green leafy herb, cherry tomatoes, and crusty bread
If you’re using a hand-held blender, do this in batches, one or two vegetables at a time. This ensures that you don’t have a chunky texture of different-textured veggies.
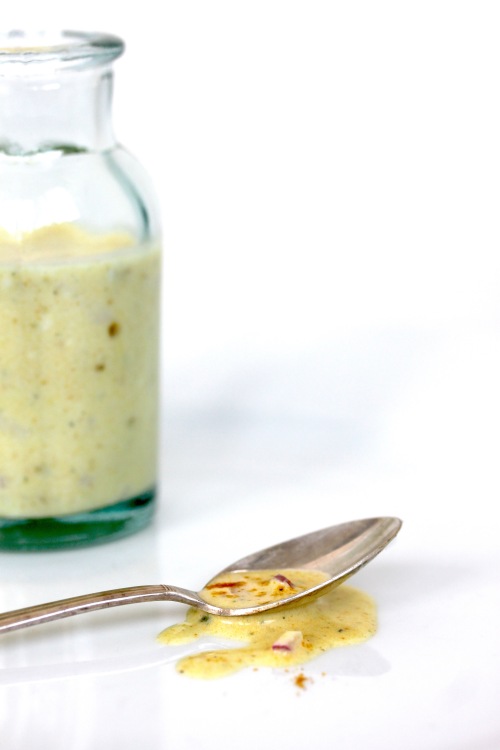
Get out your blender and two jugs. Start off with the plum tomatoes. Empty them into one of the jugs and give them a good blend. Add a few splashes of the water if you need to loosen it a bit. Once smooth, pour into the second jug. Quarter and de-seed the capsicum. With a vegetable peeler, peel away the skin. Yes, this may seem a little fiddly, but you’ll get the hang of it. Squish the capsicum towards the peeler and you’ll get all the more tricky bits, too. Add the capsicum to the jug and while you’re at it, finely chop the shallot and add it as well. The two are sort of similar in toughness, so they blend quite well together. Blend until smooth, adding a little of the water again to loosen it and make it easier to blend. Once completely smooth, add to the tomatoes. Finally, peel and core the cucumber, chop and chuck in the blender. Add a little more of the water and, surprise, also blend until smooth. Add the cucumber to the other blended veggies and add the olive oil, vinegar and salt (start with half a teaspoon, then add to taste), and give it all another blend. Add more water if you’d like it a little more liquidy.
Now pour into glasses or little bowls and decorate with a dribble of olive oil, some pepper, maybe some herbs and some deliciously crusty bread.
Also, surprisingly delicious mixed with tequila for a bloody Maria.


 Oh hey kids. Ready for some super delicious, comforting breakfast fare? Then read right on. A well-known Swiss staple, folks eat it in all kinds of combinations at all times of day, knowing that besides Rösti and Fondue, this too will give them enough stamina to wrestle a herd of cows any day. The exciting lives we lead, people.