burnt toast

Category: Savoury

Date Chutney

date chutneyMy last memory of making this chutney was from about 5 years ago, before I decided to pack my bags to whiz around half the globe to go live with wallabies and have tea parties with huntsman spiders. Back then, amidst the alps and the rivers of chocolate, when I was slowly but steadily cooking myself into a frenzy and coming to the realisation that hobbies really couldn’t get much better than this. One of my favourite places to eat, and I know I’m not alone, is a delightful vegetarian restaurant called Tibits, in the heart of Bern, situated enticingly in front of the train station. Possibly to target starved vegetarians on their way to work, on their way back from work, or everyone else who likes delicious food. The food is presented buffet-style (drool), ranging from curries and stir-frys to salads and delicious crusty bread rolls, and a tiny section of chutneys and condiments. I hold my head high without shame when I say that at least 1/5th of my plate would be dedicated to that date chutney they had there. Date chutney rocks. And so naturally I had to have the recipe.

Have you ever heard of Hiltl? It holds a record for being the oldest continuously open veggie restaurant in the world. Where will you find it? In Zürich. It is the mother of Tibits as well as of a few wonderful cookbooks, in which you will find said chutney. If you find yourself in Switzerland at the moment, do yourself a favour and go have some food at one of their establishments. If not, then all I can do is offer you my version of their recipe, which really, is still a pretty good deal.

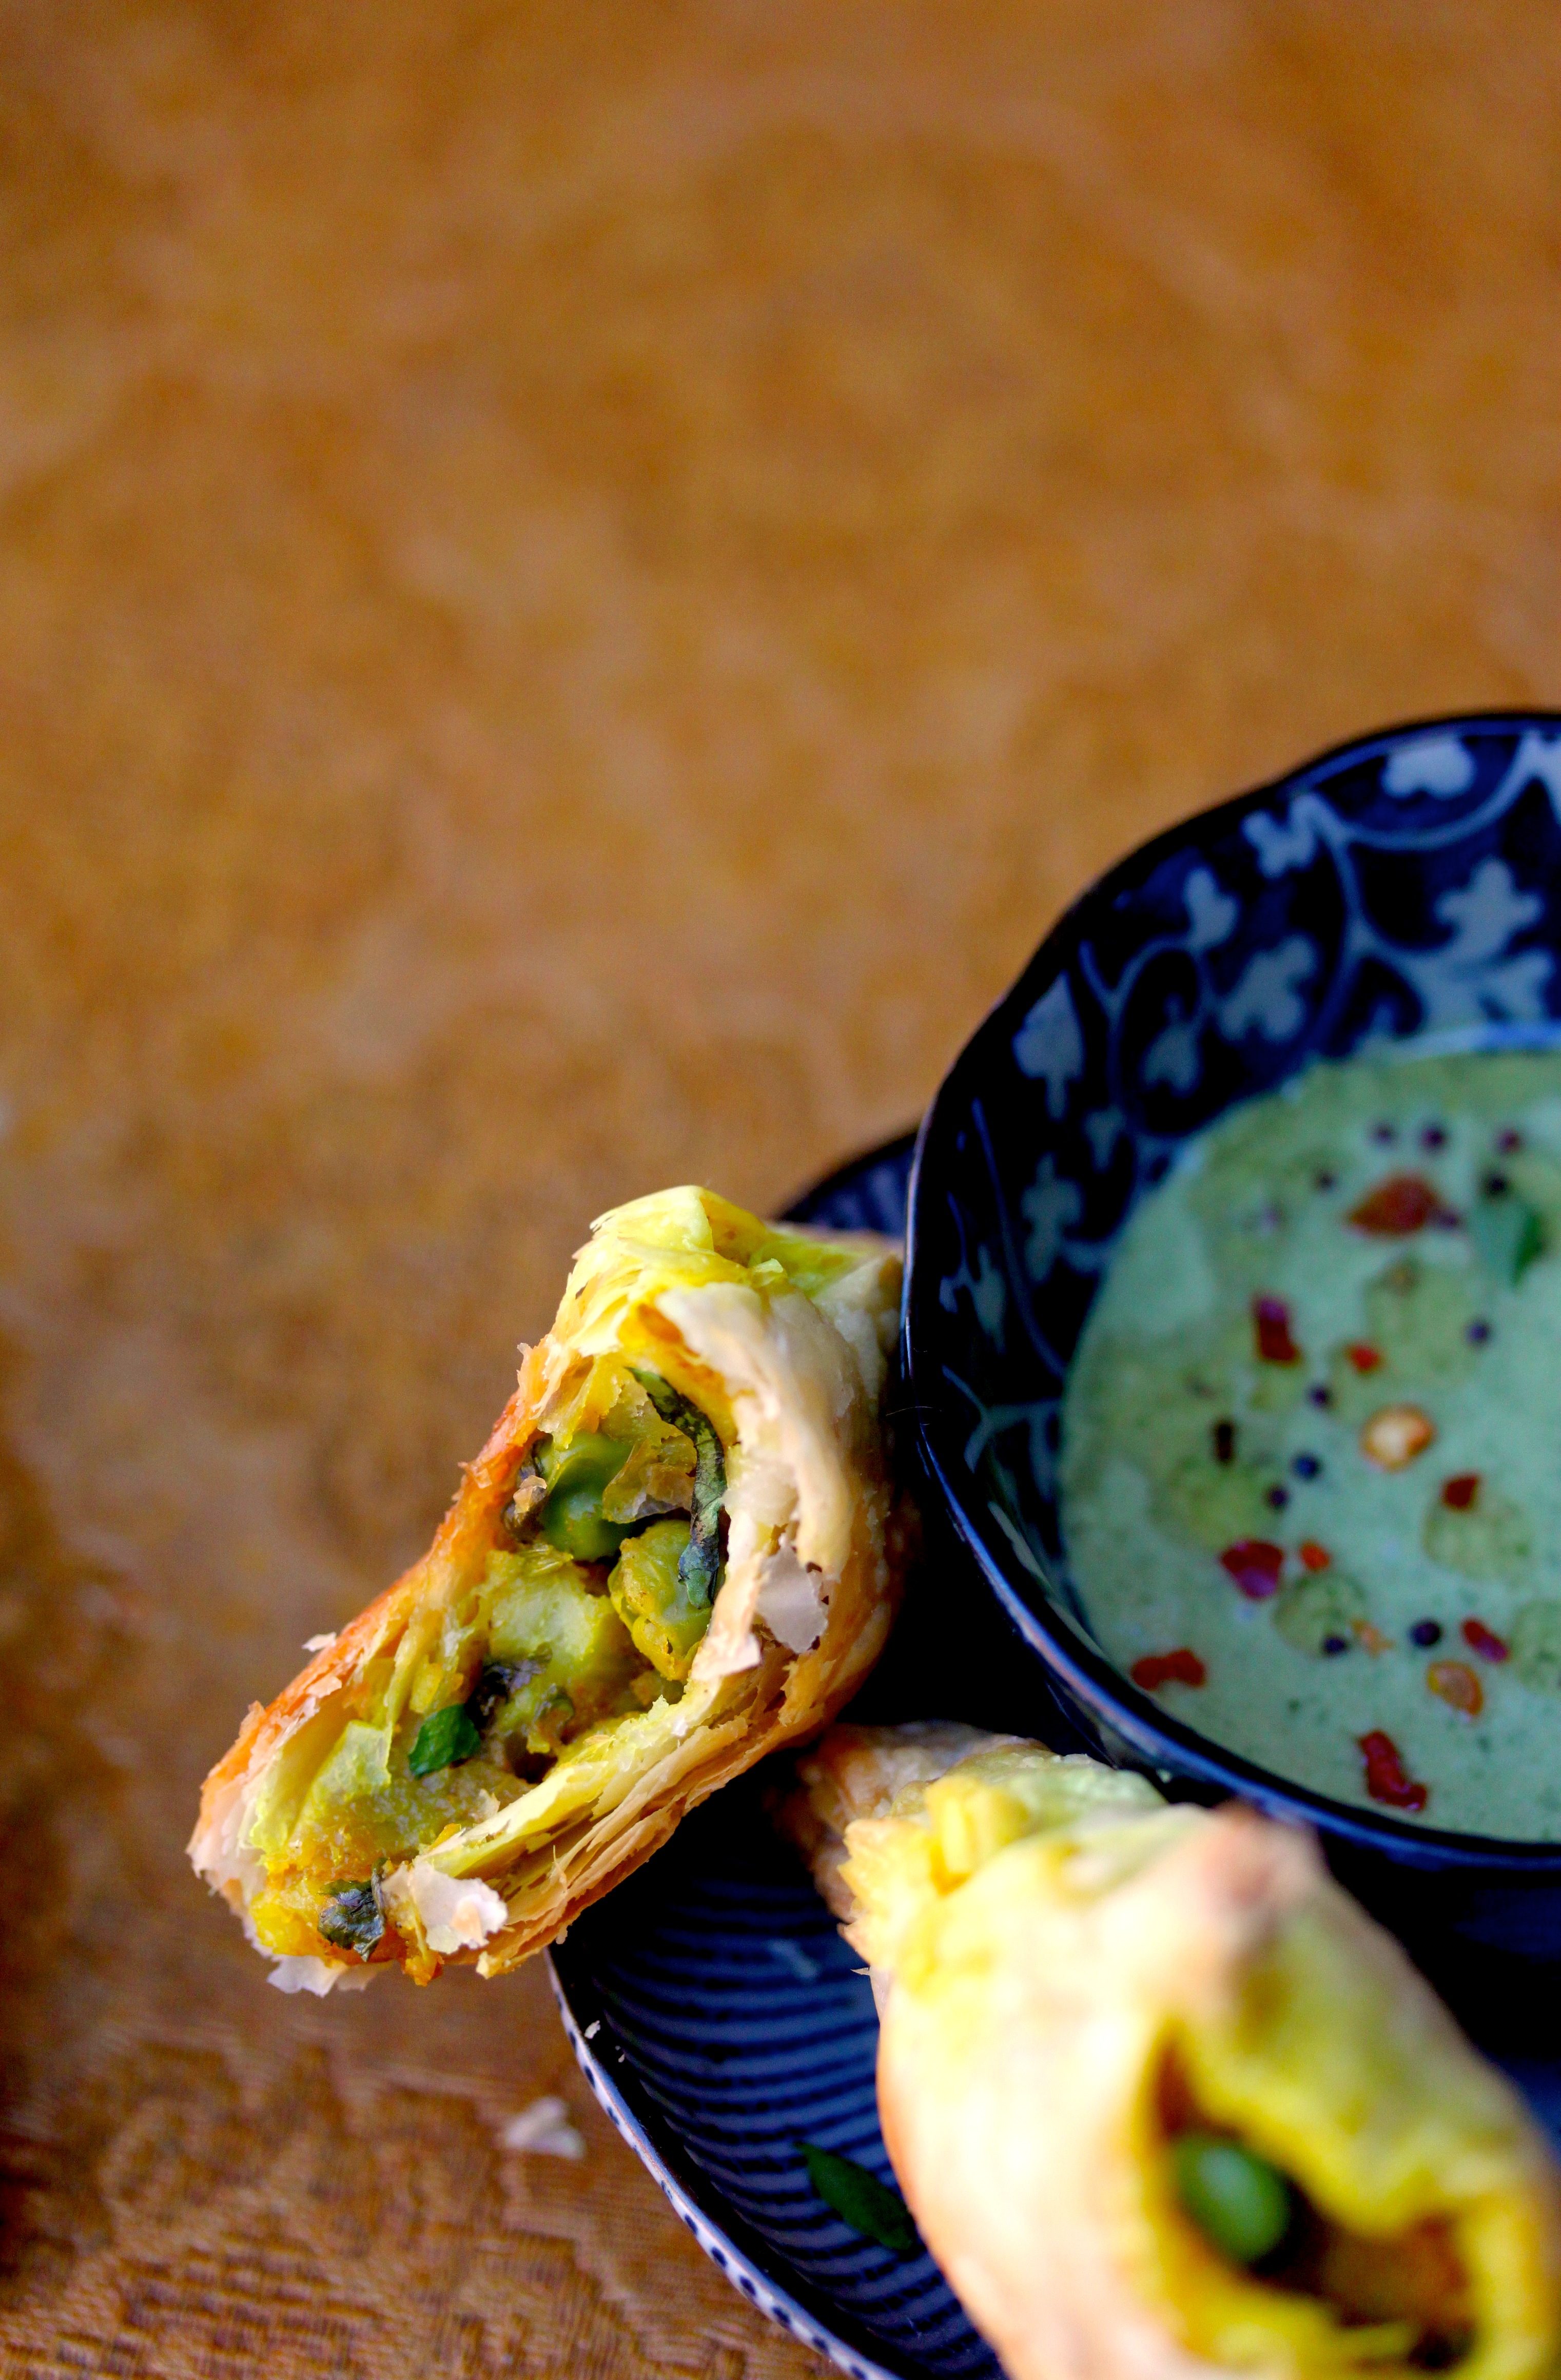
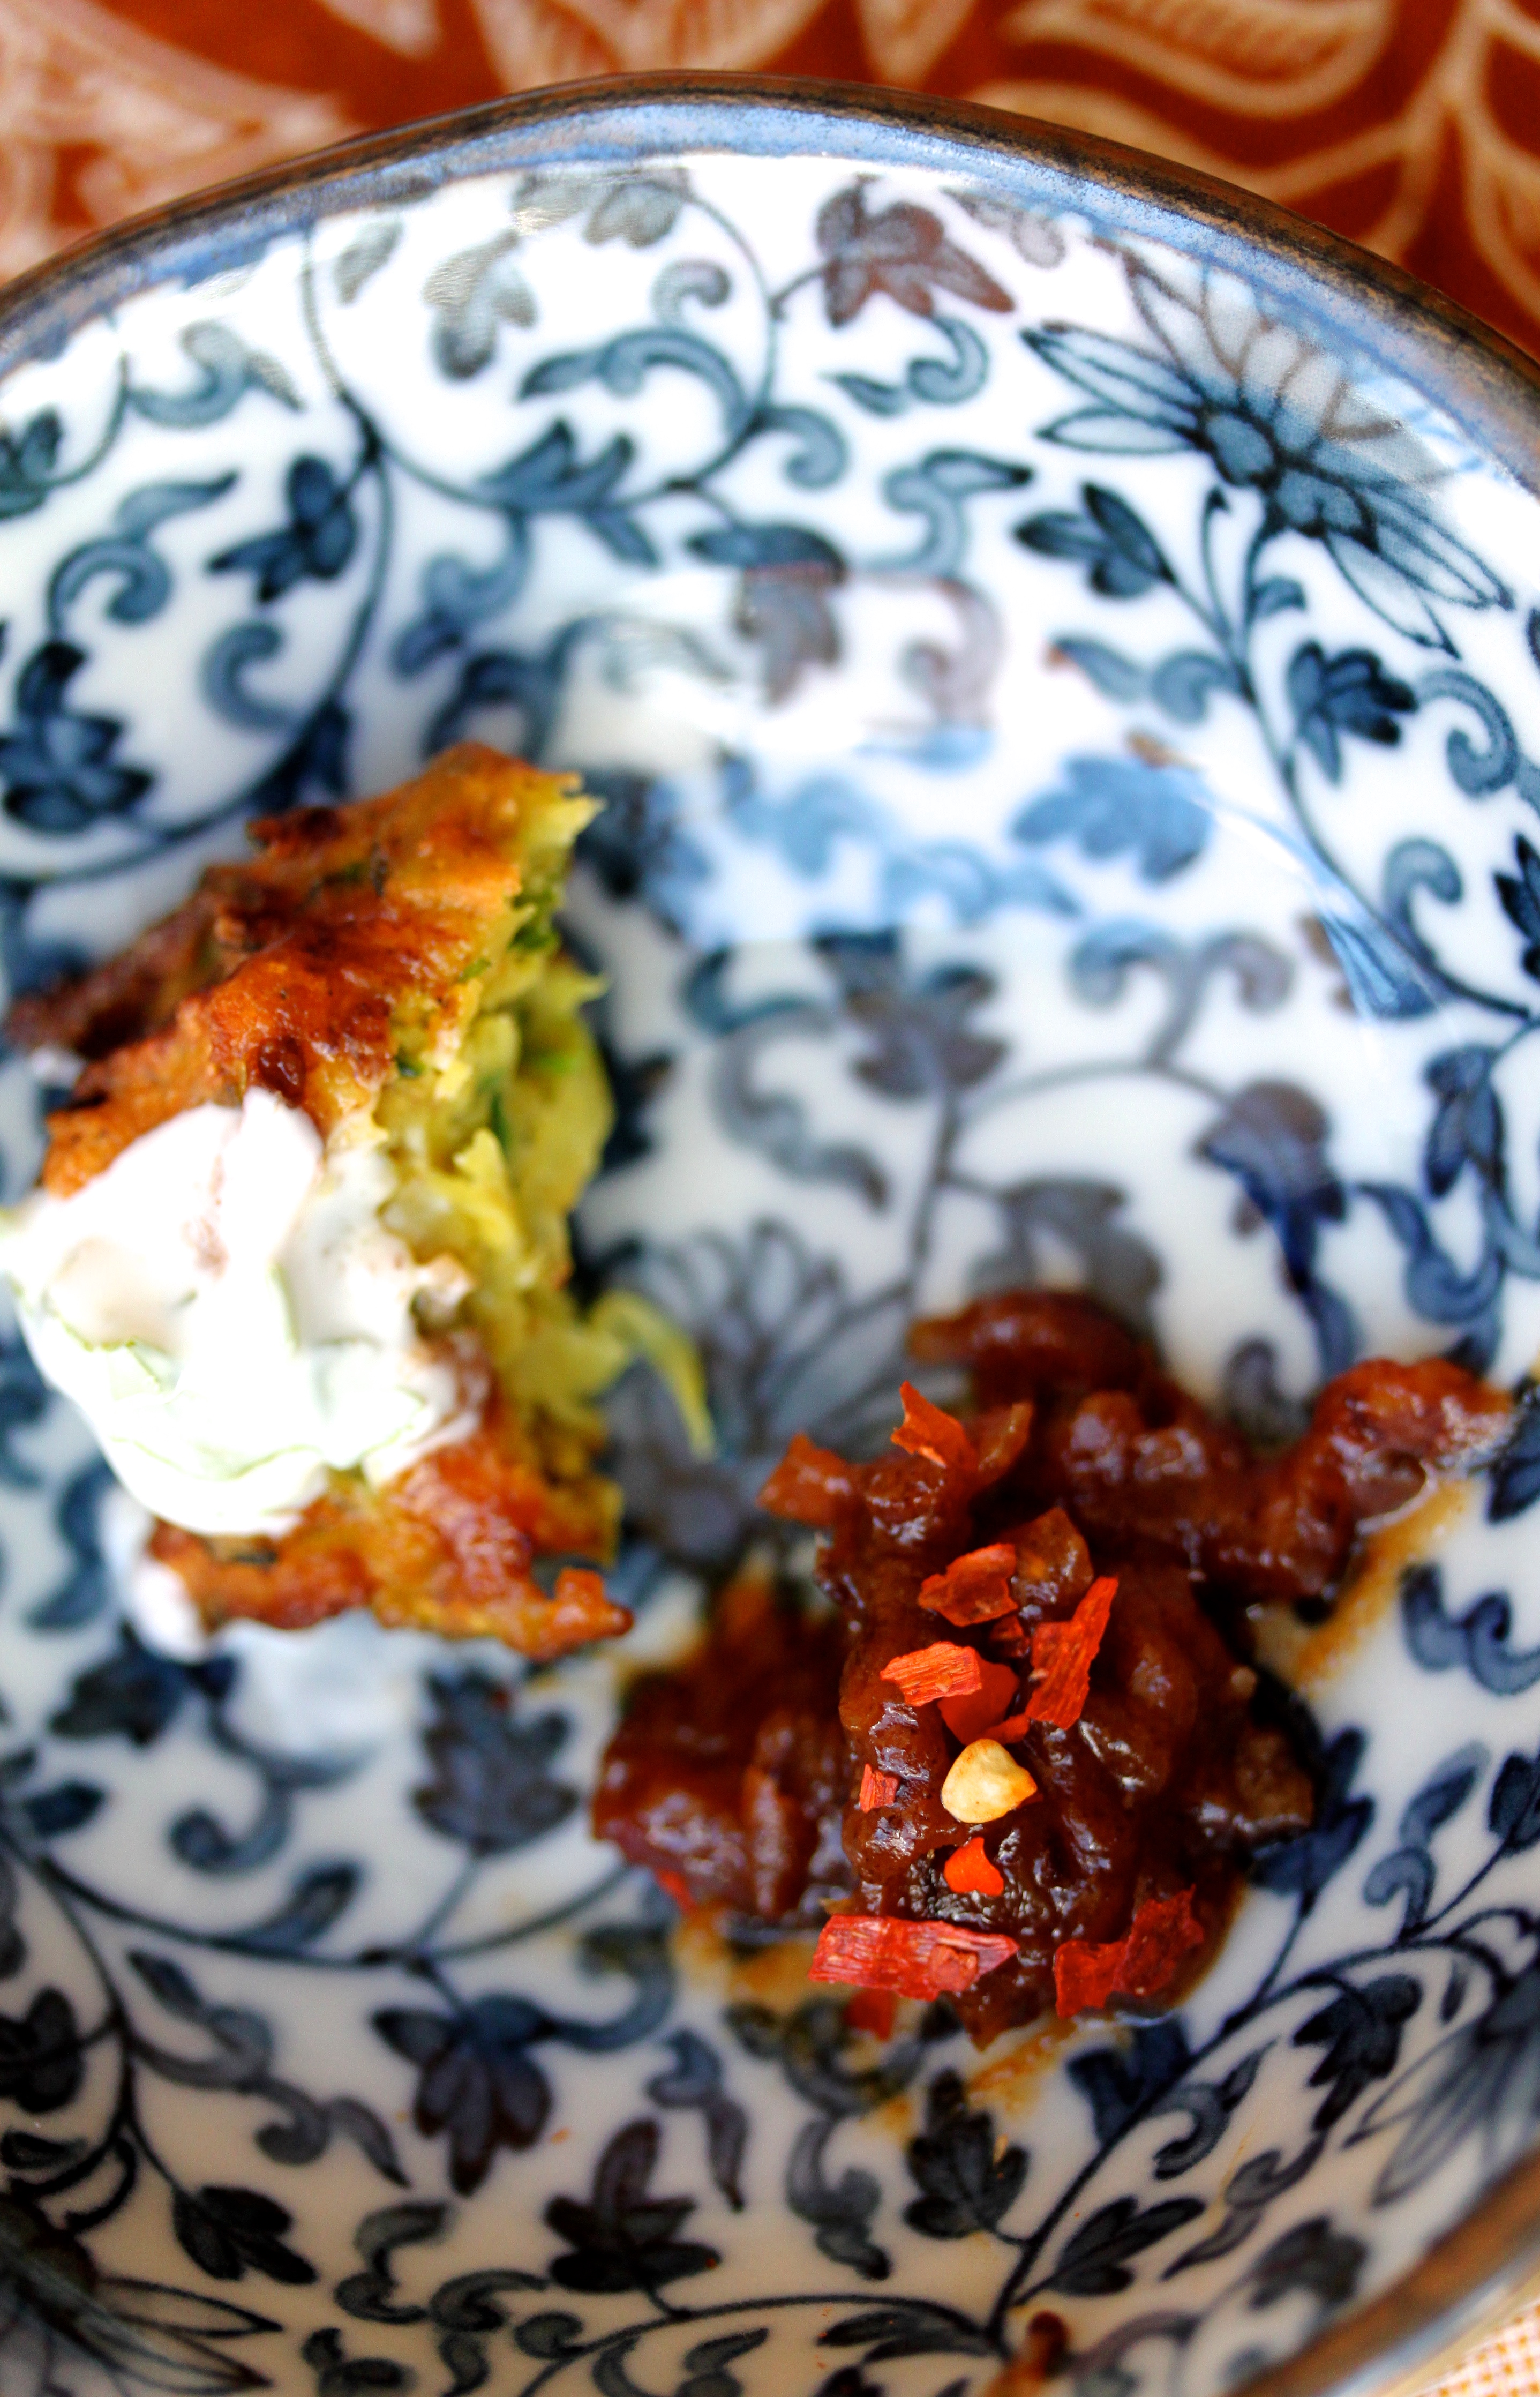
If you’re having trouble coming up with ideas for using this chutney, let me help. Number one, serve it with zucchini and onion fritters and some coriander yoghurt. That recipe will follow shortly, promise. It’s delicious with pretty much every other Indian dish, especially with dhal and poppadoms, or spread into a toastie with some melty cheese. Get the idea? good.


Date Chutney

Adapted from one of the Hiltl cookbooks

Makes about 1 ½ cups


1 large onion, finely chopped

2-3 Tbsp vegetable oil

2 cm fresh ginger, finely grated

1 tsp ground cumin

big pinch chili flakes

2 Tbsp dark brown sugar

1 tsp tamarind puree (if you only have concentrate, start with ¼ tsp and adjust to taste)

100g dates, finely chopped

2 Tbsp tomato paste

½ tsp salt

200ml water


Fry the onion in the oil until softened and starting to caramelize. Add the ginger, cumin and chili flakes, and stir for about one minute. Add the sugar, tamarind puree, dates, tomato paste and salt, and top up with the water. Give everything a good stir and let it bubble away for about 5 minutes, or until the dates have broken down and the mixture has thickened. Remove from the heat and let it cool for a bit, before transferring to a jar.

Will keep in the fridge for about 2 weeks.


Sun-dried Tomato and Mushroom Polenta Hot Dogs

sun-dried tomato and mushroom hot dogs

Have you ever felt frustrated by the overpriced mediocreness of those tubes of biodynamic free range soy which, in the occasion of a barbecue, to which you are invited, being the only vegetarian, you are forced to procure, because you do not just want to be limited to boiled sweetcorn and grilled zucchini. You want to feel the fulness that only the combination of protein and carbs can give you. So you buy them anyway, but still feel like you’re not part of the mob, because obviously you’re missing out on what is the whole point of having a fire: Le meat. Do you? Ha I don’t. Not anymore. I suffered for years my friend, so  I do know your pain. However I feel as  soon as I started to finally become cool (e.g. joining the carnivores), cautiously, but evermore enthusiastically exploring what that world of meat had to offer, vegetarianism had started to become the new cool. Such a trendsetter I was, way way ahead of my time. What use was it to me now.

I kid you, it’s super helpful. I still predominantly eat vegetarian food. It’s fun, it’s delicious, it’s easy, but it’s also  a challenge. And I love challenges. We will never have an equal substitute for meat, because that would defy the point of not eating it, and it would be insulting to the deliciousness that meat has to offer.

What I present you is a delicious alternative to the hot dog. It is jam-packed with umami flavours, a beautiful marriage of sun-dried tomatoes, caramelised mushrooms, a hint of smoked paprika, a dash or red wine and a scattering of parmesan. And when you thought it couldn’t get any better, I sneakily add a handful ground almonds to boost the protein content. These hot dogs aren’t an alternative. They’re their own star. Go forth my vegetarian and non vegetarian friends, and enjoy the tastiness which is the incredible polenta hot dog.


Sun-dried Tomato and Mushroom Polenta Hot Dogs

This makes a bit more than a liter of mixture, which will fill one large baking tray, which can be sliced into 18+ rectangle hot dogs.


A few tbsp olive oil

2 onions, finely chopped

a drizzle of golden syrup, honey or a sprinkle of sugar

10 button mushrooms, finely chopped

3 garlic cloves, finely chopped

1 tsp chopped rosemary

1 tsp smoked paprika

freshly ground black pepper

2 Tbsp soy sauce


100ml red wine

900ml water

vegetable stock powder

1 cup / 160g fine polenta

50g butter, cubed

1 cup / 100g finely grated parmesan cheese

½ cup / 50g ground almonds

10 sun-dried tomatoes, finely chopped

Heat the oil in a large fry pan and add the onions. Stir occasionally until starting to turn brown. Add the golden syrup to speed up the caramelisation. Once you’re happy with the colour, add the mushrooms, garlic, rosemary, paprika and black pepper, and cook, stirring, until it starts to smell delicious and the mushrooms seem cooked through. Add the soy sauce, stir a few more times, then take off the heat.

Heat the wine and water in a large saucepan and bring to the boil. Add the veggie stock powder (up to you how much – you can always add more right at the end), and stir in the polenta. Keep stirring until it goes thick. Remove from the heat and add the butter, cheese and almonds. Once that’s nicely incorporated, add the sun-dried tomatoes and the mushroom mixture. Line a baking tray with baking paper and spread the mixture out evenly. Let it cool out completely, either at room temperature or in the fridge to speed things up, and cut into desired length/shape.

At this stage you can pack a few away into a plastic bag and find a nice spot in the freezer for them. Because really, you’re not going to manage to eat all of them in the next few days.

When you’re ready to finish them off, preheat your oven to 200°C and bake them for 20 minutes or so until browned. Same procedure for the frozen ones, although they might need to be in there for a bit longer. I found they hold their shape best with this method. You can also fry them, but make sure you use enough oil, because they tend to stick. Serve with hot dog – friendly condiments.

Zucchini, Thyme and Whipped Feta Quesadillas

zucchini and feta quesadilla

It is slightly disturbing how much I love flour tortillas. I rarely have bread in the house because I’m a snob and see bread as the easy way out, but also because I’m lazy and think that tortillas are a perfectly acceptable substitute. If you have bread, you have a snack. If you don’t have bread, you use flour tortillas because they they require that tiny bit more effort, resulting in you feeling like a sneaky genius because you just made something delicious and impressive looking.

This is possibly my most favourite quesadilla version to date. Zucchini, thyme and garlic is a killer combo in my book, and if you contrast that with  some salty sour whipped feta, topped off with drizzle of sweet chilli, then you are well and truly in the game.

a bite left


Zucchini, Thyme and Whipped Feta Quesadillas

Makes 3-4, depending on how generously you fill them


100g feta

125g Philadelphia cream cheese, at room temperature

big glug of olive oil

600g / 4 small zucchini, thinly sliced

1 tsp fresh thyme leaves

2 fat garlic cloves, finely chopped

salt

6-8 flour tortillas

sweet chilli sauce, to serve


Start with making the whipped feta. Combine the two cheeses in a jug and give them a whizz with a hand held blender until smooth. Alternatively, mash the feta very finely with a fork and then stir into the cream cheese. Either way, make sure it is at room temperature when you use it, or else it’ll be difficult to spread.

Next, heat some olive oil in a pan and chuck in the zucchini. Stir over high heat until they start caramelising in places. Add the thyme and keep cooking until they’ve reduced considerably in volume and are softened right through. Add the garlic and some seasoning and shake through a few times before taking off the heat.

To assemble, spread out a few spoonfuls of feta mixture over a flour tortilla and top with a thin layer of zucchini. Place another tortilla on top, then whack into a big frypan. Toast it on one side until golden (you don’t need any oil for this), flip, and finish toasting it on the other side. Transfer to a cutting board, slice into 8 pieces and drizzle with some sweet chilli. Eat while still warm and repeat with the remaining tortillas.

Beetroot Dip


beetroot dip

Just when you thought there were no more dips, I come along and prove you wrong. Bam! I know, it’s a bit like Christmas. My pleasure. Truth be told, I don’t know why I’ve been withholding this baby from you. Too busy eating it I’d assume. Whatevs.

Do you like beetroot? I do. It’s particularly good in salady things, its earthy sweetness usually offset with the sour saltiness of some crumbled feta. Such a winning combo. Here in dip form, we oomp the awesomeness with some garlic, a little ground cumin and a dollop or two of greet yoghurt. You can use both canned or oven-roasted beets, only the canned variety will turn a more winey red and be more tangy, due to the pickling vinegar, while the latter will give you a zingy pink. You choose darling. I won’t judge you either way.


Beetroot Dip


1 medium beetroot

100g feta, plus a little bit more for decorating

1-2 Tbsp Greek yoghurt

1 small garlic clove

½ tsp ground cumin

½ vegetable stock granules

a sprinkling of chilli flakes

small dash soy sauce (umami that shit up)

a squeeze of lemon juice


Preheat your oven to 200°C. Line a tray with baking paper, get your beetroot, stab it all round – being incredibly careful as you do so okay? – wrap in tinfoil, then plonk it onto the baking tray and bake 45 min – 1 hour. Check with a knife to see if its done – it should slide in easily. Remove from the oven and cool. Once cool enough to handle, unwrap the foil and remove the skin. Roughly chop the flesh and transfer to a blender.

If you have a cat, at this stage he will be pestering you like crazy because he is assuming that the big lump of maroon you’re handling absolutely must be a sheep’s heart. Either ignore him, or to further confuse him, give him a sniff of the beetroot. He will be thoroughly unimpressed, but will decide to keep on meowing anyway. Cause that’s how he rolls.

Add ¾ of the 100g of feta, the yoghurt, cumin, vegetable stock granules, chilli and soy sauce. Give it a nice whiz, then have a little taste? Not tangy enough? Add a small squeeze of lemon juice. Crumble in the remaining 1/4 of the feta, give it a stir, then transfer to a bowl. Sprinkle over the extra feta over the top and you’re in business.

If you were to do this with tinned beetroot, a small can should do it, or an amount equivalent to what we used above. Omit the lemon juice because it will be tangy enough.

Quiche

zucchini and leek quiche

Quiche. Quiche can be many things. The most common species would be the bland quiche, with a handful of boring, unloved veggies chopped up and chucked in, usually raw, so you end up with this wonderfully average watery slice of wodge. Then there’s the just as famous eggy quiche, which just overtrumps with le flavor de egg, more of a frittata in a tart case than anything else. Then there’s the tasty quiche, with creamy and ultra delectable fillings, the one that trumps all. That is my favourite.

A good quiche only needs about three or so different flavourings. Three that work, three that shine. By roasting the zucchini with the thyme and softening the leek first, you concentrate the flavours, also guaranteeing yourself a non-watery filling. Not having a crazy amount of eggs is also key, and the sour cream, well that’s just delicious, and it makes things super silky.

Obviously you don’t have to make a tart crust, but I like to, because you know, if you’re going bake a quiche, you might as well do it properly.


Happy quiching.

quiche

Zucchini and Leek Quiche


1 2/3 cups (250g) plain flour

½ tsp salt

125g unsalted butter, chilled, finely chopped

2-3 Tbsp water

1 egg, chilled


1 leek (250g), white part only, sliced thinly

2 smallish zucchini (500g), sliced into ½cm rounds

2 Tbsp fresh thyme leaves

Salt

Olive oil


400ml sour cream

3 eggs

1 tsp vegetable stock powder

salt to taste

freshly ground black pepper


Combine the salt and flour in a large ball. Rub the butter into the flour until the mixture resembles breadcrumbs. Whisk the water and the egg together and add to the flour mixture, combine and knead until it comes together and forms a ball. Wrap in cling wrap and refrigerate for at least two hours.

Preheat oven to 220°C. Spread out the zucchini on lined baking tins, sprinkle over thyme, salt and some olive oil and bake until soft, reduced in size and caramelized in some bits. Remove from the oven and cool.

In the meantime, fry the leek in a saucepan over a low heat with a good glug of olive oil and a knob of butter until soft.

When you’re ready to pre-bake the crust, make sure the oven is still at 220°C and roll out the dough and fit it into a tart tin. Make sure you have a walnut-sized ball of dough left, so you can patch up any possible cracks after. Got the dough ready? Get some baking paper, lay it on top of the dough and fill with beans, or alternatively, if you’re like me and you don’t have any beans to bake, get a few sheets of aluminum foil and fit it snugly against the dough. Bake in the oven for 15 minutes, then remove the beans/foil and bake for 10 more minutes, until very lightly golden. Remove from the oven. If there are any tears or cracks, get your leftover dough and patch them up.

Combine the sour cream, eggs, and vegetable stock powder in a jug and give it a few bursts with a hand held blender. Add salt and pepper to taste.

Now darling, time to assemble. Turn the oven down to 180°C. Get your leeks and spread them over the base of your tart. Pour over the filling, then arrange the zucchini over the top. Place in the oven and bake for 40 minutes. If you have a gas oven, I suggest you bake it on the bottom part of the oven for the first 20 minutes, then transfer to the top for the next 20. If you have a fan-forced oven, then I am truly jealous of you. The quiche is done when it’s not wobbly in the middle anymore and is nicely golden on top.

Quinoa – It’s come this far

quinoa and sweet potato patties

I like food that triggers emotion. The nostalgia a slice of good, crusty bread evokes within me, transporting me back to the magnificent bakeries of Bern. The tango of crunchy, creamy, salty, and sweet of a Greek salad, winking at you with all its healthy colours screaming “Eat me! I’m good for you!” Or the guilty decadence that comes with eating something rich and chocolatey, the guilt that over the years of consumption has turned into pleasure with a hint of satisfaction. Quinoa did none of these things to me. On the rare occasion I’d be eating it I’d question it’s validity, how serious this grain was about its super powers, because in all due respect, taste-wise, it gave me nothing.

However, being the flexitarian that I am, it seemed almost ridiculous not to give it and its complete protein and minerals a fifth chance. Apparently, we all seem to need more quinoa in our lives, so who am I to argue. Even though I’m incredibly hesitant to hop on that superfood bandwagon everyone’s been going nuts about, because, you know, it’s not really my style. I don’t follow trends. I will not admit defeat, I’m too proud. But I will admit that I’m still getting over how good these little suckers taste.

quinoa times


Quinoa and Sweet Potato Patties

Makes 9

1 medium sweet potato

2 fat garlic cloves, unpeeled

½ cup quinoa

1 bay leaf

pinch of cinnamon

vegetable stock granules, or salt, for purists

1 Tbsp white miso

¼ cup pumpkin seeds

Preheat the oven to 200°C. Line a baking tray with baking paper. Chop the sweet potato into 2cm cubes, and place them into the baking tray, tossing them with a glug of olive oil, and finishing with a sprinkling of salt. Wrap the two garlic cloves in aluminium foil and pop next to the sweet potato cubes. Roast for about 20 minutes or until the sweet potato is soft. Remove from the oven and cool.

In the meantime, soak the quinoa in ¾ cup water in a saucepan for 15 minutes. Add the bay leaf and cinnamon and bring to the boil. Simmer for 20 minutes, then cover and let steam until all the liquid has evaporated and the grains are nice and fluffy.

Toast the pumpkin seeds in a pan until they’ve all puffed up. Let them cool, than whizz them up to a fine powder in a blender. Stop before they turn into a paste.

To assemble, remove the bay leaf from the quinoa. Add the mashed sweet potato, the ground pumpkin seeds, the miso and as little or as much vegetable stock granules or salt as you think is right. Give it all a nice good stir, then, with wet hands, form into patties. Heat a frying pan with a splash of olive oil and fry those cuties until golden on each side. Done. I usually have them with some crumbled feta and a few chopped parsley leaves, sometimes even a fried egg. Best breakfast ever.

If you don’t feel like cooking them all at once, they’ll keep in the fridge for a few days.

Potato and Pea Samosas

samosasYeah. Samosas. Right up there on my list of favourite snack food. But then again, anything coming from the beautiful country of India gets top marks in my book. In my oh-so-short life I have been there three times already, and you can take my word I’ll be going back there again.

Top three random memories of India:

Playing hide and seek as a nine year old in the hotel’s 5-day old algae-tinged pool. Endless hours of fun. Other experiences included pools almost opaque with chlorine your eyes stung just by looking at it. These did not include hide and seek, or me, for that matter.

The after effects of my first sips of my mum’s gin and tonic making a 12-year old me walk dizzily into a rubbish bin next to our tiny hotel room situated right on the beach in Goa. Don’t laugh. That’s just mean.

A cook in the green hills of Kumili showing my 16-year old self how he made his beetroot malai kofta. They were insane guys. Served in a coconut cashew sauce spiced with star anise. You know you’re jealous.

a bite of samosa

I don’t think I have to tell you how much I love these little guys. I mean, deliciousness wrapped in pastry? Right? Give ‘em a go please. Right now.

Potato and Pea Samosas


4 medium (floury) potatoes, peeled and chopped into 1cm cubes

2 Tbsp each of vegetable oil and butter

2 medium onions, finely chopped

2 fat garlic cloves, crushed

1 knob of ginger, grated, giving you about 1 Tbsp of grated ginger

1 tsp ground turmeric

1 ½ tsp ground cumin

1 ½ tsp ground coriander

¼ tsp chili flakes

¼ tsp cinnamon

1 Tbsp lemon juice

splash of soy sauce

salt

1/2 cup (65g) frozen peas

½ bunch coriander, leaves roughly chopped

4 sheets frozen puff pastry, thawed

Place your cubed potatoes into a pot and cover with water from a recently boiled kettle. Boil until soft, but still holding their shape. Drain.

In the meantime, melt the oil and butter in a wide fry pan. Add your onions and gently cook over low heat until soft and translucent. Add the garlic and ginger, and turn up the heat a little. Stir until everything takes on a little colour. Add the turmeric, cumin, ground coriander, chili, cinnamon and lemon juice, give it a stir, then add the potatoes. Let them hang out together for about 10 minutes. Season with a little soy sauce and salt. Remember, the potatoes will soak up quite a bit of flavor i.e. salt, so you may need to adjust your seasoning later again. Once the potatoes have gone a little mushy, remove from the heat. Stir in the peas and coriander, and let cool to room temperature.

Preheat oven to 220°C. To make the triangles, cut each sheet into 9 squares. Place a scant tablespoon of filling on each and fold over a corner. Pinch the edges together – if you can get a fancy twist going all the better – and lay them on a baking sheet. Bake for 10-15 minutes or until golden.

Serve hot with coriander and coconut chutney.

Triangles

spinach and cheese triangle

Ah life. It is all quite vague and unclear at times, especially mornings. All of that “Why am I up? Should I eat or go back to sleep? And if I did choose to eat, what other than chocolate is there to choose from? Or indeed go for a run or dedicate more time to hating your neighbours because they’re up at six renovating again?” – business.

What is not unclear though, not in the least, is the incredible awesomeness of these little triangular parcels of tasty goodness. Ever feel as if that spinach and cheese triangle you’ve just bitten into hasn’t quite reached it’s full potential? Like not even near it? There has got to be more to it than that hot wet lump of mossy cardboard, really. Or is that what is to be expected? Don’t let them lower your triangular standards, never. There is so much deliciousness out there, and I have taken it upon myself to find it for you. I know. After all these years of suffering I come forth and save your taste buds’ world again – disgustingly romantic really.

Without further ado, I introduce you to my latest fling, the seductive herb, spinach, and cheese triangle.  What clearly defines its unmistakable tastiness is the combination of parsley, dill, coriander, mint and spring onions, as well as the spinach. The bland ricotta is replaced with some creamy Philadelphia, rounded off with a hint of cinnamon and cardamom.  Sound good? I know. Go on lover, go impress someone with these.

triangle bite

Herby Spinach and Cheese Triangles

 Makes 36 triangles

For the filling:

2 Tbsp each butter and olive oil

1 bunch spring onions, finely chopped

200g (about 4 cups firmly packed) baby spinach, chopped

2 cups (one of those massive bunches you can get these days) parsley, finely chopped

1 cup (about 1 bunch) coriander, finely chopped

½ cup dill, finely chopped

½ cup mint, finely chopped

splash soy sauce

2 tsp vegetable stock powder

a big pinch of chilli

¾ tsp ground cinnamon

¾ tsp ground cardamom

250g Philadelphia cream cheese, cut into 2cm chunks

about 4 sheets of frozen puff pastry

Melt the butter with the oil in a large fry pan over medium heat. Add the spring onions and cook till softened. Next comes the spinach. Give it a bit of a stir for a few minutes until it’s wilted, and there’s enough space to add the rest of the herbs. Give them about 5 minutes, before adding the soy, stock powder, chilli, cinnamon, cardamom and cream cheese. Reduce the heat to low and stir continuously, until the cream cheese is nicely incorporated into the mixture. Done! Now, let it cool.

In the meantime, Preheat the oven to 220°C and take out your frozen puff pastry to let it thaw. Working with one sheet at a time, cut it into nine equal squares. Place a scant tablespoon of filling on each, fold over a corner and seal by pinching the edges together, so that you’re left with a pretty little triangle. Continue with the rest until all the mixture’s used up. Place the lovelies on a prepared baking tray and bake for 10-15 minutes until golden.

Fridays

sour cream pizza with red wine onions and rocket

I like Fridays.  Friday afternoons. I like them best when I can share them with a good friend or two. I’ll whip up some sexy little cocktail and lay out something delicious and carb – based, like this sour cream pizza with red wine caramelized onions and rocket, yes sir. In case you were wondering, this is a radified version of the already quite mesmerizing Germain Flammkuchen, minus the cheese or the lardons.

And then we all eat and drink to our heart’s content and live happily ever after. It’s that good.

Sour Cream Pizza with Red Wine Onions and Rocket

Pizza dough

2 cups / 300g plain flour

2 Tbsp olive oil

1 tsp salt

1 tsp sugar

1 sachet / 7g instant dried yeast

180 ml warm water, plus more if necessary

3 large red onions, halved and thinly sliced

3 Tbsp olive oil

2 Tbsp soy sauce

50ml/ a splash of red wine

salt and pepper

250g sour cream

2 handfuls of rocket

Alright, lets start with the dough. Me and this recipe are pretty close chums at this point, because I make it at least once a week. You should too. Combine the flour, oil, salt, sugar and yeast in a big bowl. Stir in the water with a bread knife until roughly combined, then get your hands in there and knead it until it’s smooth. Cover with cling wrap and set aside in a warm place until doubled in size. Alternatively, cover and place in the fridge overnight for a slow rise. Whatever works best for you my pretty.

Next, ze onions. Throw them into a large fry pan with the olive oil and cook them slowly until soft and golden. At this point, add in the soy sauce and the red wine and let the liquids bubble away, until you’re left with a deliciously aromatic burgundy mess. Season with salt and pepper and cool slightly.

Preheat the oven to 200°C. If you’re a proud owner of round pizza trays, get them out, otherwise, if you’re like me, use two rectangular ones. Grease them with butter – I find the dough has a much better grip on a buttered tray, rather than an oiled one.  Divide your dough into two and roll out in your tins. I usually use a round drinking glass for this. Schmear the sour cream evenly over the dough with a spoon, then spread over the onion. Bake in the oven for about 12 – 15 minutes, or until the edges are golden. Remove from the oven, top with the rocket, and cut into bite-sized pieces. Yum.

Delish.

caramelised onion and goat's cheese tarts

Sweet, meltingly soft onion, crisp buttery pastry, salty tangy goat’s cheese and the heat of cracked black pepper, the aroma of fresh thyme wafting up your nose, into the back of your head, into your heart, into your stomach, making you giddy with desire.

Have another one. I know you want to.

Caramelised Onion and Goat’s Cheese tartlets

Makes 18

Just a note on the puff pastry. The stuff we get here is different in size to what I used to get in Switzerland, so I’m sure this varies everywhere. The sheets I work with are 25cm x 25cm, so adjust accordingly.

2 sheets frozen puff pastry

6 large onions, halved and finely sliced

30g butter

3 Tbsp each of olive oil and water

2 teaspoons honey

2 tsp vegetable stock granules

3 Tbsp soy sauce

pepper

salt, if needed

1 Tbsp chopped fresh thyme, plus extra for garnish

50-100g soft goat’s cheese, depending on how intense you want it

Take your puff pastry out of the freezer and let it thaw while you get on with the rest of the recipe.

Preheat oven to 200°C.

Combine onions, butter, oil and water in a big frying pan. Cover and cook over low heat until onion has softened. Remove lid and add honey, stock granules, soy sauce, pepper and thyme and cook until they have taken on a lovely caramel brown colour. Remove from heat.

Cut each pastry sheet into 9 squares and prick them with a fork so they don’t puff up like crazy. Lay them out on a baking sheet. Pop in the oven and bake for 12-15 minutes or until golden. Take them out and let them cool down.

To assemble, Top each square of pastry with some of the onion, then sprinkle over some goat’s cheese. Top with a few little leaves of the thyme and you’re ready to go.

These are best eaten on the day they are made. Not as if you’d let them last that long anyway.