burnt toast

Quince Jelly, Queen of Jellies

IMG_7943.jpg

Quince jelly is the epitome of sophistication in the jam world. No jam will ever be as fancy or as florally seductive as this one. Not even that lemon grass and lavender jelly your aunt Ruth gave you last Christmas. It is also dead simple to make, despite you may think scrolling through my instructions. I like to know what I’m doing when I’m making jelly, with all those boiling points and whatnot. So this is my simplified, non-candy thermometered version for you (but really for next year me). No other jelly will make you feel as emancipated as this one. You cook it for an hour and then pouf! It’s jelly. I know, magic.

This will take a bit of time, so it will require a bit of planning and / or a rainy day or two.  I like to boil and drip the quince on an evening, so that I can turn the liquid into jelly the following day.

Quince Jelly

Enough quinces to fill a big pot, about 6, depending on size

Water

A medium-meshed sieve

Large bowl

Measuring cup


500g sugar per 600ml quince liquid

½ large lemon per 600ml quince liquid

a saucer

small sieve

(another) big pot of boiling water (for sterilizing the jars)

Jam jars (with well-fitting lids)

Tongs (to remove the hot jars from the boiling water)

Soup ladle


You can tell that this is a bit of a “wing it” job by reading through the ingredients list, so if you’re feeling panicky already, I suggest you have plenty of sugar and lemons on hand, just in case you end up with way more than planned. On that note, the quince water will happily wait for you for a few days in the fridge. I get just over 1200ml of quince water per batch if that’s any help.

The leftover quince can be kept in the fridge for a few days. There are a bunch of things you can do with it, quince paste being one of them. But I’ll get to that recipe in a bit.

Chop the quince into chunks. To start off, I usually cut through the top where the stem is, as I find it can be pretty hard to slice from the side. Don’t worry about size or shape here. The smaller the pieces, the faster it’ll cook, but you’ll also be chopping longer. If you come across any worms or weird growth, just cut it away.

Fill your pot with the quince chunks and fill up with water, 2-3 cm shy of the edge. Top with a lid and bring to the boil. Move the lid slightly so some of the steam can come out, and reduce the heat a little. Let it cook until done – this will vary, depending on how enthusiastically you cut the fruit. I’d say between ½ to 1 hour. The quince is done once it’s very soft when pierced with a knife.

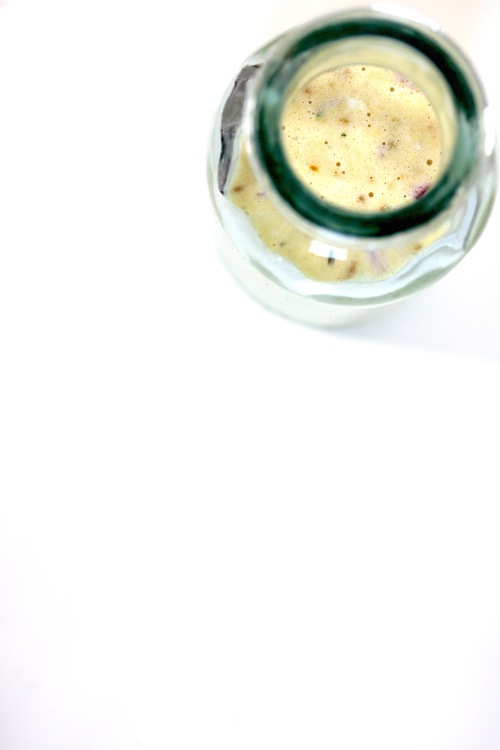
Let everything cool to room temperature. I wouldn’t suggest you rush this part, as I feel the liquid really benefits from hanging with the fruit for a few hours. Once cool, grab your sieve and prop it over the large bowl and gently pour the water and quinces into it. This helps get rid of any grit or seeds that may have got loose during the cooking process. Press down slightly on the fruit in the sieve and place something slightly heavy on top to help coax out the rest of the juices (I usually stick it in the fridge overnight).

Measure the liquid: Per 600ml quince liquid, you’ll need 500g of white sugar and the juice of half a lemon. Transfer all of this back into the pot you used at the beginning. Bring to a soft boil. Now the watching, waiting and skimming part begins! Once the mixture starts boiling, reduce the heat. Use the small sieve to scoop away any white froth that forms. All up, I’d say this part takes about one hour. Keep an eye on it so it doesn’t boil over, but also so it doesn’t stop boiling.

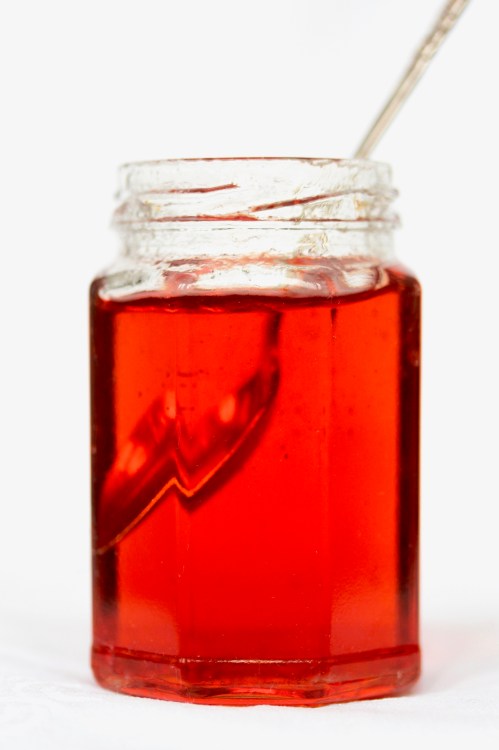
While waiting for the liquid to thicken, put your saucer in the freezer. You’ll use this for testing the doneness of the jelly later. Once the jelly starts to turn a beautiful reddish colour (at about 40 min), take your plate out and drop some hot jelly on it with a teaspoon. Wait a few seconds, then drag your finger through it. If it starts to form wrinkles, it’s nearly ready.

At this point, get your Big pot with boiling water ready. Fill the glass jars about halfway up with hot water and fit them snugly in the pot. Slip the lids in too. Let them boil away for at least 10 minutes.

Once you feel the jelly is ready (don’t be afraid of letting it boil a little longer – it takes a while for it to get super stodgy), take the tongs and pick out one of the glass jars, emptying any of the water inside it back into the pot. Place it down in front of you, making sure all the water has evaporated, then take the ladle and scoop some of the hot jelly slowly into the jar. Pick out the right lid from the water bath and screw it on. Repeat with the rest.

Once all your jars are filled and screwed tightly shut, turn them around and pop them on their head for about half an hour, then turn them back over again (this is the moment of truth – if some of the jelly starts seeping out from the sides, you know the lid is crap. Open and pour back into the pot while you go off looking for a new jar) The jelly will thicken as it cools. You’ve made quince jelly!

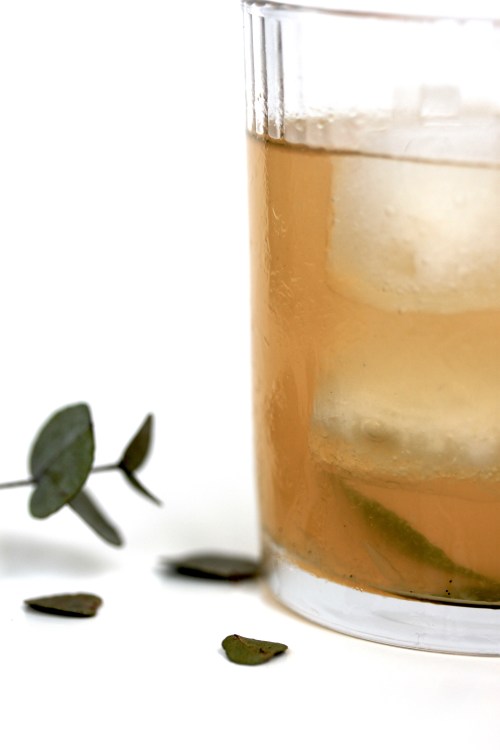
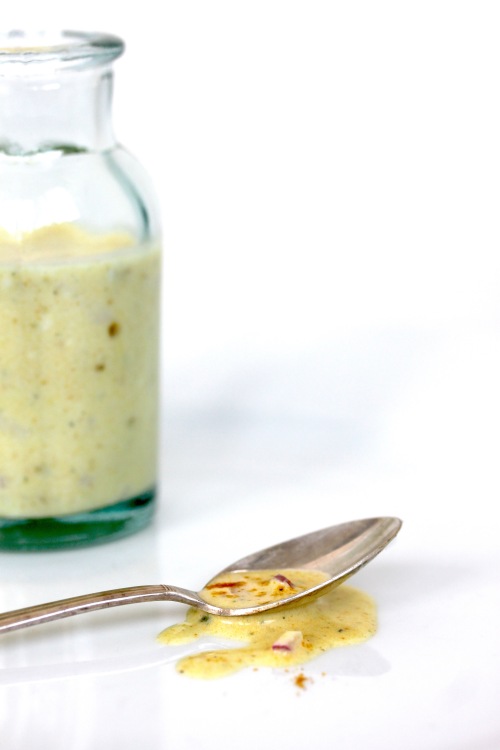
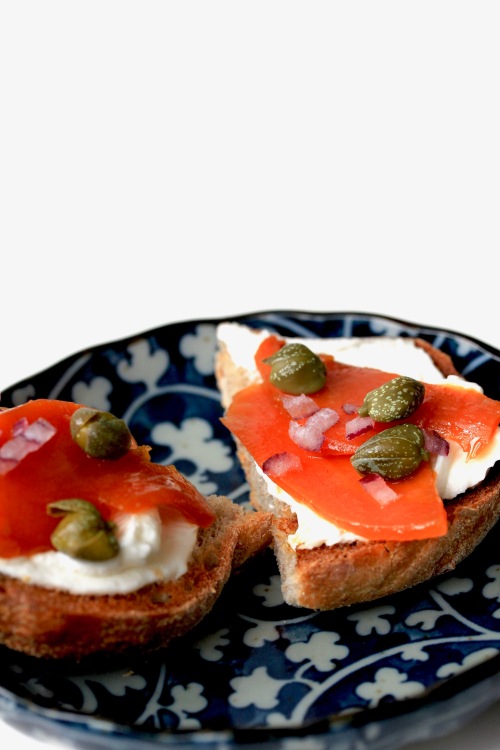
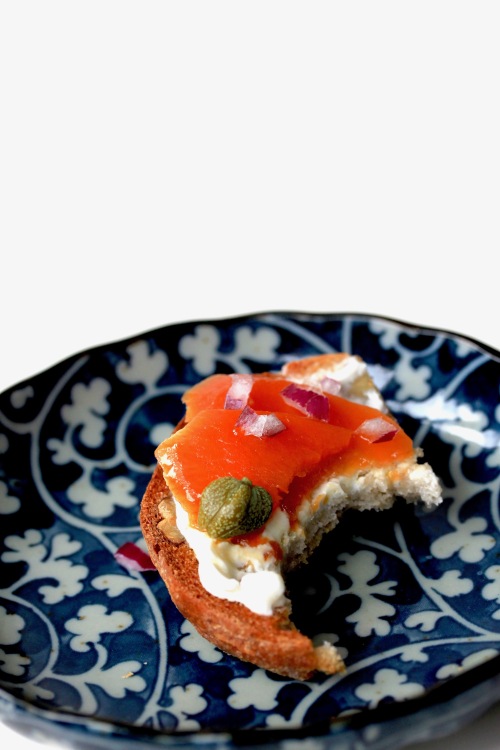
Besides bread and butter, it’s especially great with cheese on toast, or even stirred into a fruity herbal infusion, or for glancing at admiringly from time to time.

Advertisement

Berry Bircher Muesli with Toasted Walnuts

img_7926
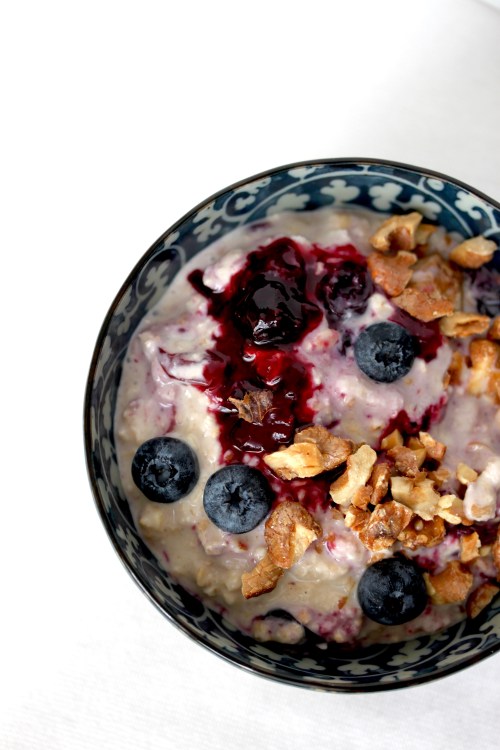
Oh hey kids. Ready for some super delicious, comforting breakfast fare? Then read right on. A well-known Swiss staple, folks eat it in all kinds of combinations at all times of day, knowing that besides Rösti and Fondue, this too will give them enough stamina to wrestle a herd of cows any day. The exciting lives we lead, people.

In all honesty, and I do say this a lot, this might be my favourite version ever. I’ve had my fair share over the years and can give you a few pointers of what I think should be included (or excluded):

  •  Always add a grated apple. And try to let it sit overnight. It sort of melts into the mixture by the following day, and forms a lovely flavour base together with the dates.
  • Only add fresh fruit when ready to serve, or else make a compote or jam. I hate fresh fruit going mushy, but I do like the flavour they add. To intensify this flavour, compote is the way to go.
  •  If adding nuts, roast them and do so at the end as well. Soggy blandness is never the answer.
  •  Don’t go crazy on the sweetener at the beginning. The rest of the ingredients will omit their own share of sweetness during the resting period, so let them do that first. You can always add more later.
  • Stick to only a small number of different fruit, about 2-4, but don’t add anything ridiculous like kiwi fruit or pineapple. This isn’t a fruit party.
  • And last but not least, add that pinch of salt, to everything, always. It makes it taste so much better.


Berry Bircher Muesli with toasted Walnuts

Serves 4 – This’ll keep nicely in the fridge for a few days. Just give it a good stir when you get it out.

150g instant oats

350 ml full fat milk

350g plain yoghurt

2 Tbsp cream or sour cream (optional)

1 Tbsp maple syrup or honey

½ tsp ground cinnamon

1 pinch of salt

1 large apple, grated (with skin on)

6 dates, quartered and chopped into small pieces

20g (small handful) of cranberries, roughly chopped


200g berries, I used blueberries and strawberries, chopped if needed

2Tbsp raw sugar

¼ tsp vanilla essence


100g walnuts

1-2 Tbsp maple syrup or honey

sprinkling of salt


more berries, to serve


This is best made the day before, or at least two hours in advance, so plan accordingly.

Get a big container that comes with a lid and combine the oats, milk, yoghurt and cream in it. Give it a good stir, then add the maple syrup, cinnamon and salt, as well as the apple, dates and cranberries. One last stir, then pop the lid on and transfer to the fridge.

In the meantime, combine the berries with the sugar and the vanilla in a small pan. Cook over low heat until it starts to thicken into a delicious smelling, syrupy fruit jam. Remove from the heat and pour into a little jar. Let it cool at room temperature before screwing on a lid and packing it into the fridge to join his oat friend.

Preheat the oven to 180°C. Line a baking tray with baking paper, and add the whole walnuts, spacing them out. Bake for about 5 minutes, then drizzle over the maple syrup and sprinkle over the salt. Give it all a good stir, then return to the oven for about 10 more minutes – you might need less, so keep your eyes peeled. The nuts are good when they have taken on a slightly darker colour, and the maple syrup has more or less “evaporated”. Remove from the oven and cool. Chop into small pieces and transfer to another jar.

A couple of hours or even a day later, Take out your oats. Give them another stir before adding the berry jam and about half of the nuts and most of the fresh berries. Gently combine them so that you can still see a few streaks of purple from the berry jam. Top with the remaining nuts and whatever berries remain. Eat.

img_7935

Yes, I really love using this bowl. And no, unless you gift me with a better option, I won’t stop using it in my shoots.

Potato Salad

IMG_7922

I don’t know how you like your potato salads, but this is how we have ours. You should try it.


Potato Salad

Serves 4 as a side


1 kg waxy potatoes

salt

100ml hot vegetable stock

6 Tbsp mayonnaise

6 Tbsp sunflower oil

5 Tbsp white balsamic

1 ½ tsp vegetable stock powder

1 tsp curry powder

1tsp maple syrup, or failing that, raw sugar

1 red onion, finely chopped

1 bunch chives, snipped

15 cornichons, finely sliced

parsley, to garnish (if you can be bothered)

I do this the lazy way because I can’t be bothered to peel hot potatoes or wait till they’re cool – so instead, I peel and slice them thinly before boiling them. So smart and efficient, I know. So once they’re all sliced, they go into a big pot with some water. Bring to the boil and add a bit of salt, about as much as you’d add to a pot of pasta – it’s got to taste salty. Let the potato slices boil until just soft – check every few minutes by nipping some off with a spoon and tasting it: firm but cooked is what we’re going for. When they’re ready  a few will have decided to break apart already, which is fine. Drain them and put them in a big bowl. Add the veggie stock and let it sit until cooled down a bit. Hot potatoes tend to be thirsty, so we want to minimise the possibility of them soaking up too much dressing. You can give it a stir here and there, but don’t go too crazy because otherwise you’ll end up with mash.

In the meantime, mix the mayo, oil, balsamic, stock powder, maple syrup, onion and chives in a separate bowl. Pour over the potatoes, add the cornichons and gently stir. The dressing will become quite liquid because of the residual heat of the potatoes, but do not fear! It will all thicken again once it’s reached room temperature. Cover it and transfer to the fridge for at least half an hour. Give it a quick taste – you might need to add some more salt – then throw some parsley on top and dig in.

Spring Fizz

IMG_7915

It’s summer guys! Confusing Swiss summer. I’m surprisingly okay with that. No sweating! No sunburn! And lots of happy green trees having a ball of a time. Gentle monsoons is where we’re at.

In order to celebrate the very agreeable climate had here, I thought I’d serve you up a nice little tipple. This is what I’ve been nipping at in the past few months, at first because I was in the mood for something a little less heavy, and then later because there was an inordinate need for something refreshing and citrusy to reflect the parasol- and gumboot clad world outside.


Spring Fizz

Adapted from this recipe . Serves 1.

Ice

2 tsp orange, lemon and vanilla syrup – recipe below

2 tsp lime juice

3 shakes bitters

15 ml sweet vermouth

30 ml gin

1 strip lime rind

30 – 60 ml sparkling water

Fill a tumbler with ice. Drizzle over the syrup and juice. Add the bitters, vermouth and gin. Rub the lime rind around the rim of the glass, give it a bit of a squeeze and drop it in. Give everything a good stir and top it with as much sparkling water as you’d like.


Orange, Lemon and Vanilla Syrup

1 orange

1 lemon

½ tsp vanilla seed paste or ½ vanilla pod, seeds scraped

250g sugar

300ml water

Using a vegetable peeler, remove as much of the orange and lemon peel as you can. Transfer to a small saucepan. Juice the orange and the lemon, adding that to the peel. Add the rest of the ingredients and bring to a boil. Let it simmer for about 10 minutes (maybe more), until slightly thickened. Remove from the heat and let it cool. When it’s reached room temperature, remove the peel and pour into a large jar. Keeps for a few weeks in the fridge.

Cheese and Kale Pide

IMG_7693

So today I’m going to tell you the tale of this snazzy piece of ultimate comfort. It started off as the famed khachapuri, a wonderful Georgian cheese stuffed bread, ideal for accompanying anything and everything, especially soup. However, on the visual front it isn’t too much of a looker, so that’s where our trusty pide comes in. Between the two of them, pide wins all the beauty pageants because of its “I’m so much more en vogue than pizza” –presentation. The pide needed something else though, it needed something to cut through its wonderful if not sometimes slightly overwhelming cheesiness, something with a bit of bite, some garlicky, vegetably umph. Hold your kittens, make way for the kale! Here it comes, move out of the way, hail oh mighty kale! Of course I was going to put kale on my cheese pide. I haven’t written about kale for months. One crazy deficit over here.

No but for real now, this is wonderful. I absolutely love these as breakfast, but they go well with anything feast- or soup related. I personally go for a drizzle of sweet chilli with mine, but see what flavour combo works best for your tastebuds.

If you’re just after the cheese-less, round, covered version of this, i.e. khachapuri, Follow the recipe below, but instead of shaping boats, roll out two big round disks of dough, covering one with the cheese mixture, then pinch together the edges. The cooking time should be more or less the same, but keep an eye on it. As soon as it’s golden brown on top it’s done.

IMG_7705

Cheese and Kale Pide

Adapted from Nigella Lawson’s Feast

Makes 4 x 30cm / 6  x 20cm pide


Dough:

250g yoghurt

1 egg

25g butter, melted

300g flour

½ tsp salt

1 tsp baking soda


Kale topping:

A big glug of olive oil

1 bunch / packet kale, about 250g, finely sliced

3 fat garlic cloves, chopped

splash of soy sauce


Cheese filling:

150g mozzarella, preferably the more firm sort (because it’s easier to grate)

150g feta, crumbled

150g cream cheese

1 egg


For the dough, whisk together the yoghurt, butter and egg with a fork. In a large bowl, add 250g of your flour – keep the rest close at hand, because you’ll need it as you keep going. Stir in your yoghurt mixture. Stir stir stir, using a knife or spoon first, until it starts to combine and you can use your hands. Add more flour gradually until you have a soft but not sticky dough. Add the salt and the baking soda and knead that into the dough. I’m not quite sure why this happens at the end, but Nigella says to do so and we don’t question her. Next, cover the dough with clingwrap and let it rest for about 20 – 30 minutes.

Next, get a large frying pan and add the olive oil and kale. At this point I like to add a splash of water and cover it with a lid, and let it cook on medium heat until softened. Remove the lid and turn up the heat, adding the garlic. Once the kale’s volume has reduced to about 1/5 of what it was when it was freshly chopped, add the soy sauce and let that bubble away before removing it from the heat.

For the cheese filling, grate the mozzarella and combine it with the feta and the cream cheese. Stir in the egg. It’s not completely necessary to add the egg, however I find it helps keep the filling together.

Preheat the oven to 220°C. Divide the dough into 4 or 6 pieces. Roll one of those pieces into an oval shape of about 5mm thickness. Spread some of the cheese mixture along the centre and add some of the kale. Fold in the edges and pinch together the ends. Repeat with the rest of the ingredients.

Slide the pide onto a baking paper lined baking tray and bake for about 20 minutes, or until the edges are golden and the bottom is cooked when lifted up to test. Serve with sweet chilli sauce, a knife and a napkin.

Salad

IMG_7667.jpg

Let’s talk about salad. Nah just kidding, let’s talk about salad dressing. I do love me a good salad here and there, with crumbled bits of toasted stuff and juicy bursts of caramelised and vine-ripened vegetable shards literally jumping onto the fork with vitamin-spurred enthusiasm. Those salads are fantastic. But really, a salad is nothing without it’s dressing.  Sometimes, when I’m less in the mood for a frilly salad, I’ll go for something  simpler, dressed in a creamy outfit, something that’ll accompany my meal of carb on carb and turn it into something that resembles a balanced food pyramid if you squint. For once no chia seed and watermelon oil dressing kittens, but a dressing your grandma would make if she were Swiss, lived on top of a mountain and yodelled her chickens awake in the wee hours of the morning. It’s a dressing that would make most picky grandchildren lick their plates clean.

IMG_7662.jpg

Oma’s Salad Dressing

4 Tbsp mayonnaise (all my Australian friends – the good stuff ok? None of that sweet gunk)

4 Tbsp olive oil

3 Tbsp white balsamic (replace with white wine vinegar, but add a pinch of sugar to balance out the flavours)

3 Tbsp milk

1 shallot, finely chopped

  • ½ tsp vegetable stock powder

½ tsp mild curry powder (more would make it too exotic for Oma, and we can’t have that)

a few grinds of black pepper

Whisk the ingredients together, adding the liquids slowly to the mayo so it becomes smooth. Done!

This will keep in the fridge for three or so days, but depending on the amount of salad you’re making, you might need all of it.


If you want a few ideas of how to use it, here are two:

One of the most frequently eaten salads here in Switzerland would be the “Nüsslersalat”, or lambs lettuce. It has a delicate, tear-shaped leaf and is known for its nutty flavour. If you can’t find it, replace with anything else that’s green that you’re in the mood for. All we do is finely dice a few hard-boiled eggs and toss them with the lettuce and the dressing. Serve immediately, because the greens don’t like to stand around for too long.

If you’re wanting to jazz up your carrot salad, thinly slice a head of fennel with half a kilo of carrots, throw some of the springy green fronds in, a few chopped parsley leaves if you have some, and mix with the dressing.

IMG_7677.jpg

Coconut Macaroons

coconut macaroons

…And merry December to you too.

My expectations of a cold winter have been fulfilled (woo!), it has snowed once and rained a few more other times. Switzerland, it’s good to be back.

It’s biscuit season over here, and enthusiastic about European tradition as I am, I’m surprised it’s taken me this long to tell you guys about my first batch of goodies. They’re quite wonderful, if I say so myself. They’re nothing typically traditional, but still familiar enough and a bunch of fun to shape. The trick to getting moist, sticky-centred, yet toasty crunchy crusted macaroons is to give them a pre-treatment in a large frypan, giving them plenty of rest time before finishing them off in the oven.

coconut macaroon 2

Coconut Macaroon Pyramids

from the wonderful David Leibovitz

Makes 30-35

4 large egg whites

1¼ cups / 275g sugar

¼ teaspoon salt

1 tablespoon honey

2½ cups / 230g desiccated coconut

¼ cup / 40g flour

½ teaspoon vanilla essence

In a large frypan, mix together the egg whites, sugar, salt, honey, coconut and flour.

Over low heat, stir the mixture constantly, making sure you scrape the bottom to prevent it from scorching.

When the mixture becomes hot, stir it for 2-3 more minutes, then remove it from the heat and add the vanilla essence. Transfer it to a bowl and cool it to room temperature – it will be a lot easier to handle then.

If you’re not in a hurry, or completely forgot you had something important on, you can cover the macaroon dough and keep it in the fridge for up to a week.

However, if you are ready, preheat your oven to 180°C (160° fan oven) and line a baking tray with baking paper.

Form 1 Tbsp mounds of the mixture into triangular pyramids. To help get each side nice and flat, flatten it gently on an even surface. If your hands get to sticky, give them a rinse under some cold water Space them evenly on the baking sheet. Bake for 16-18 minutes, until deep golden brown. Cool completely.

Saffron and Kale Soup with Chipotle Buttered Toast

IMG_7554

Almost four weeks ago, I got on a plane with two very heavy suitcases, two packets of tissues and a heart full of excitement. After six absolutely wonderful  years in Australia, I returned to Switzerland, my other home. It’s great to be back. This time round it’s a little easier getting used to my “new” home, because everything is familiar. Yet there are so many subtle differences I’m having to accustom myself to, such as not adding a “how are you?” after the initial “hello” when speaking to a stranger, having to look up when waiting for a green light when crossing the street because it doesn’t make a clicking noise when it’s okay to go and remembering that most of the shops are definitely not open on Sundays. And at the same time I can’t help but miss the smell of eucalyptus, the friendly cats everywhere, the affordable restaurant food, the lovely friends left behind. Sigh.

Before I get all mopey and nostalgic, let me share with you a recipe I used to make about once a week back in the Melbourne era. It’s not really a recipe per se, more an assembly of ingredients, one I’d fall back onto when my five a day count was near non-existent, when I felt that I needed to give myself and my suffering immune system some pampering. It’s a simple vegetable soup, with the addition of saffron, for a little special hint of sunny warmth. You can add pulses, pasta and any herb you like, but I usually like to keep it simple and stick to the veggies in my fridge. The actual star of this dish is the chipotle butter, which I used to have on toast, now on fresh, crunchy, chewy bread (gasp!). It’s spicy and wonderful and very very morish, so be sure to make more than you think you’ll need.

To cold days, to winter, to warm hugs and memories.


Saffron and Kale Soup with Chipotle Buttered Toast

Serves 4


olive oil

1 large onion, finely chopped

2 garlic cloves, sliced thinly

2 tomatoes, sliced thinly

1/6 celeriac, finely chopped

2 carrots, quartered, finely chopped

3 medium potatoes, cut into small cubes

4-5 kale leaves, very thinly sliced

1.5 litres of vegetable stock

1 big pinch saffron threads

a dash of soy sauce

a few drops of lemon juice

salt, pepper

In a large saucepan, fry the onion in the oil until translucent. Add the garlic, stir for a minute or two, then add the tomatoes. Once the tomatoes are soft, add the rest of the vegetables, the stock and the saffron. Bring to the boil and simmer gently until all vegetables are cooked through. Brighten the soup with the lemon (you don’t need much) juice, add the soy sauce for a boost of umami, and season to taste. Serve with crusty bread or toast and chipotle butter (below).


Chipotle Butter

100g butter, softened

2 tsp chipotle chilli powder

salt

a tiny squeeze of lemon juice

In a bowl, beat the butter with a fork to loosen it up. Add one teaspoon of chipotle and a few pinches of salt, as well as the lemon. Give it a good stir. Have a taste, then add more or the rest of the chipotle. It will seem quite spicy at first, however it will soften as it rests.

If you really don’t like spicy, I suggest you only use ¼ tsp of chipotle and replace the rest with smoked paprika powder.

The Perfect Dirty

perfect martini

For years I had decided that martinis weren’t my thing. Too strong. what’s the point, give me one of those sweet ones instead. And to some extent, I still agree with that line of thought. But now I also know that there is a martini for everyone, or at least almost everyone, minus the uncool people. This came to be while I was having dinner at this Italian place with two dear friends of mine, and for some reason I was feeling a bit frisky and up for a bit of a challenge in the drink sector. I confided in the lovely waitress that I was new to this, and I don’t know what was said between her and the barman, or what he was plotting in that little genius mind of his, but what came to the table a few minutes later made me re-evaluate my life’s decisions and ponder over what else was lying ahead of me, yet to be uncovered or rediscovered. The martini was ever so slightly sweet, balanced out by the salt from the olive brine, and the gin, oh how it sung. None of that punch-in-your-face bull of “I’m a purist martini, triple concentrated and only held within the vicinity of a photograph of a water droplet, because dilution would be a sin. Vermouth was never in fashion anyway.” No, this was sophistication in a glass.

Weeks later, after repeated experimentation with vermouth and olives of different degrees colour and texture, we got there. And I’ve been making them ever since. You’ve heard of a perfect martini, right? That’s equal parts sweet to dry vermouth. I don’t care what you think, but I like the sweet edge the former gives to the drink. The way to prevent it from becoming  too girly or overpowering, is by giving it a nice dose of dirty with that olive brine. Essentially it’s combining a perfect and the dirty. In with the gin, stir, stir, stir, pour, garnish, yum.

If you’ve never been a martini person either, give this a try. It might just change your mind. And if you already have a favourite recipe, and you will have it no other way, then I hope that at least you can appreciate the photographs I made of mine.

martini 2

The Perfect Dirty

Makes one glass

10ml sweet vermouth

10ml dry vermouth

20ml olive brine from a jar of Sicilian olives (the green ones with the pip intact)

40ml gin

ice

3 Sicilian olives (or more – I’m a greedy creature)

Combine both vermouths with the olive brine, gin and ice in a jar or tall glass. Stir intensely for a minute or so until very very cold – you want a bit of dilution going on if you’re like me and don’t like being assaulted in the neck by what tastes like a shot of scented nail polish remover. If you’re unsure, give it a little taste. Give it a few more stirs if you’re not satisfied yet, or strain it into a coupe glass. Add your olives and enjoy.

Combine both vermouths with the olive brine, gin and ice in a jar or tall glass. Stir intensely for a minute or so until very very cold – you want a bit of dilution going on if you’re like me and don’t like being assaulted in the neck by what tastes like a shot of scented nail polish remover. If you’re unsure, give it a little taste. Give it a few more stirs if you’re not satisfied yet, or strain it into a coupe glass. Add your olives and enjoy.

Mulled Winey Goodness

mulled wine‘Tis the season my friends. Time for mulled everything. Everyone is trying to top everyone else in winging about how cold it is, but secretly they love it, because who doesn’t love a steaming mug of something spiked warming up their frozen nose hair. Warmed nose hair for everyone! We’ve had hot buttered rum before, which went down a treat – but now it’s time for the antioxidant-rich grape to take centre stage and charm our socks off.

mulled cloves

This recipe calls for the creation of a complexly spiced syrup, to which later you add some red and a few splashes of ginger wine. That way you can either store it in the fridge for a few weeks, use half, or have it all straight away. This method also ensures that most of the alcohol is still present by the time of serving. None of this boiling-wine-for-two-hours business. And honestly? Most bars, no matter how craft and boutique and amazing they are, their mulled wine won’t be as good as this. Promise.

mulled orange

Delicious Mulled Wine

via the Guardian

This will make about 12 servings. If you aren’t up for cracking open two bottles of red because you’re a smallish group, make the syrup and only use half, combined with half of the rest of the ingredients. The syrup will last for a few weeks in a jar in the fridge.

2 oranges, washed
1 lemon, peel only
150g raw sugar
5 cloves, plus extra for garnish
5 cardamom pods, bruised
1 cinnamon stick
A pinch of freshly grated nutmeg
2 bottles of fruity full-bodied red wine – Shiraz-Cabernet for me please
150ml ginger wine

Remove the peel from one orange using a vegetable peeler, then squeeze out the juice. Add both to a big saucepan along with the lemon peel, the sugar and the spices. Add a few small glugs of wine, enough to cover the sugar, and let it simmer over low heat, stirring occasionally, for about 10 minutes. You should be left with a thick syrup. If I have the time I like to let it sit for a bit to let the flavours meld.

If you’re keen on doing some shmancy decorating, get the remaining orange and the remaining cloves, and make a few (as many guests as you have)vertical clove lines down the side of the orange. slice it into segments  and voilà,  your garnish is complete.

Once you’re ready to serve, add the rest of the red wine as well as the ginger wine, and gently heat the mixture until hot. Ladle into cups and squeeze an orange segment onto the edge of each. Yum!


%d bloggers like this: