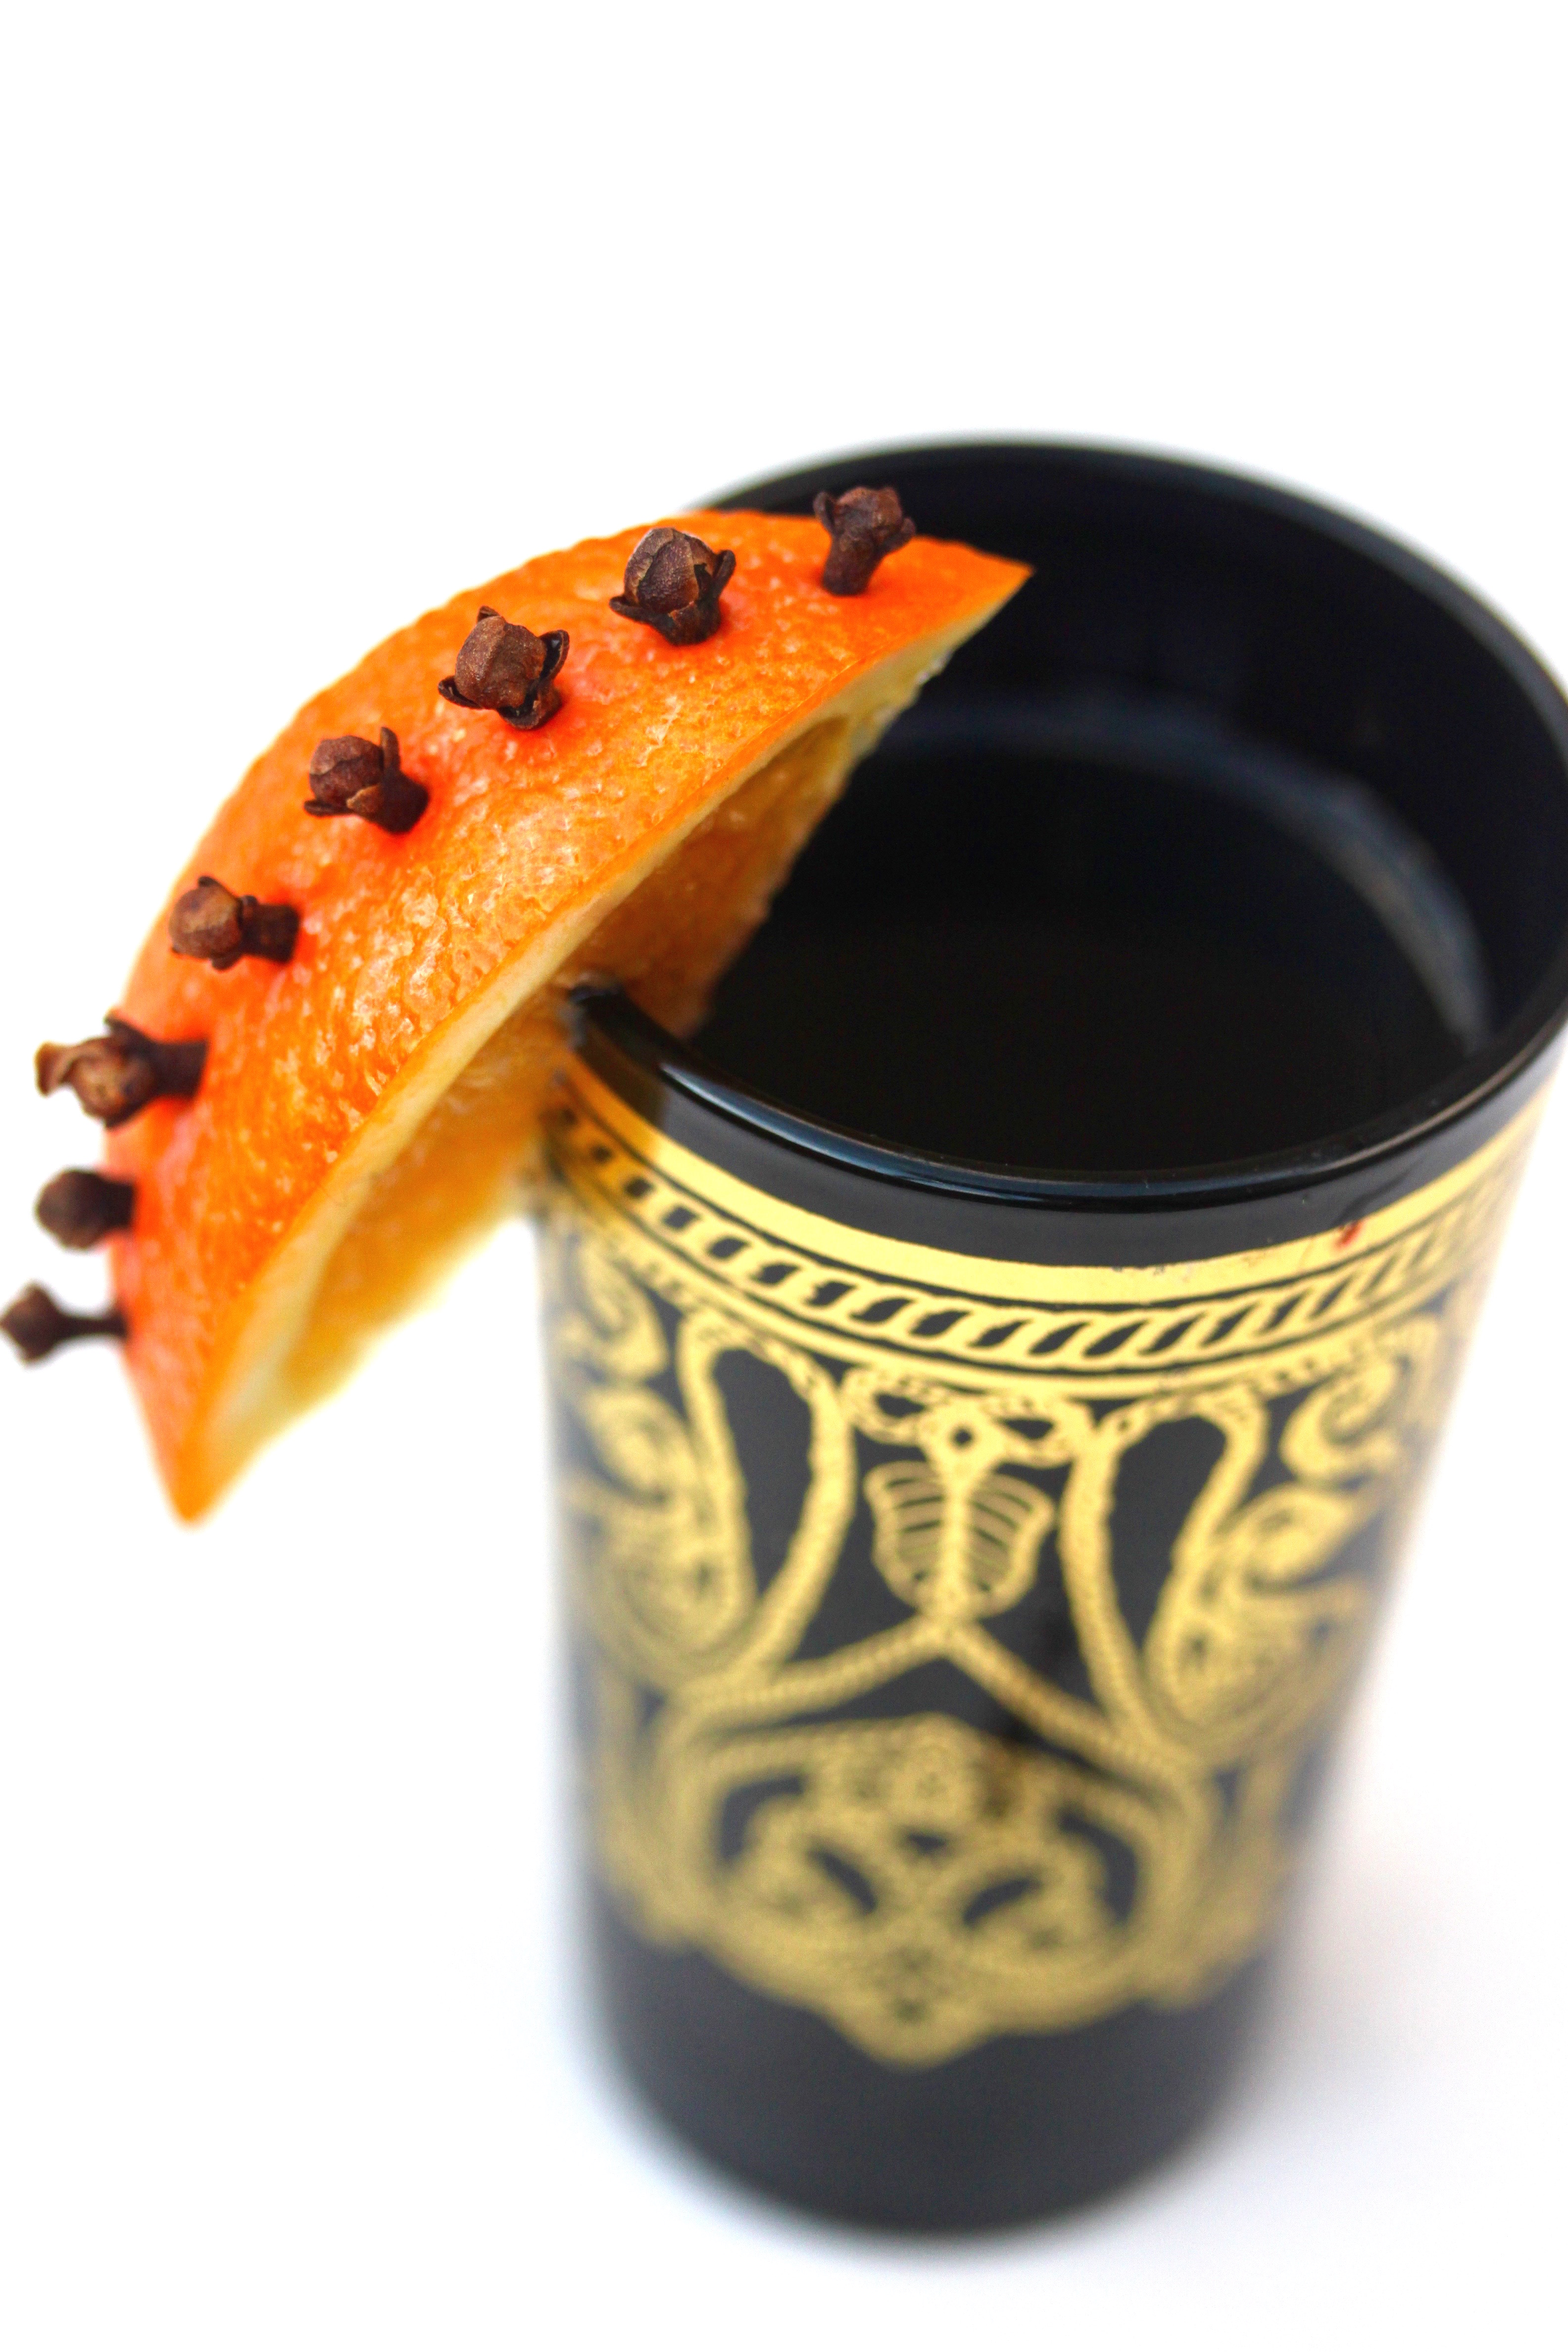
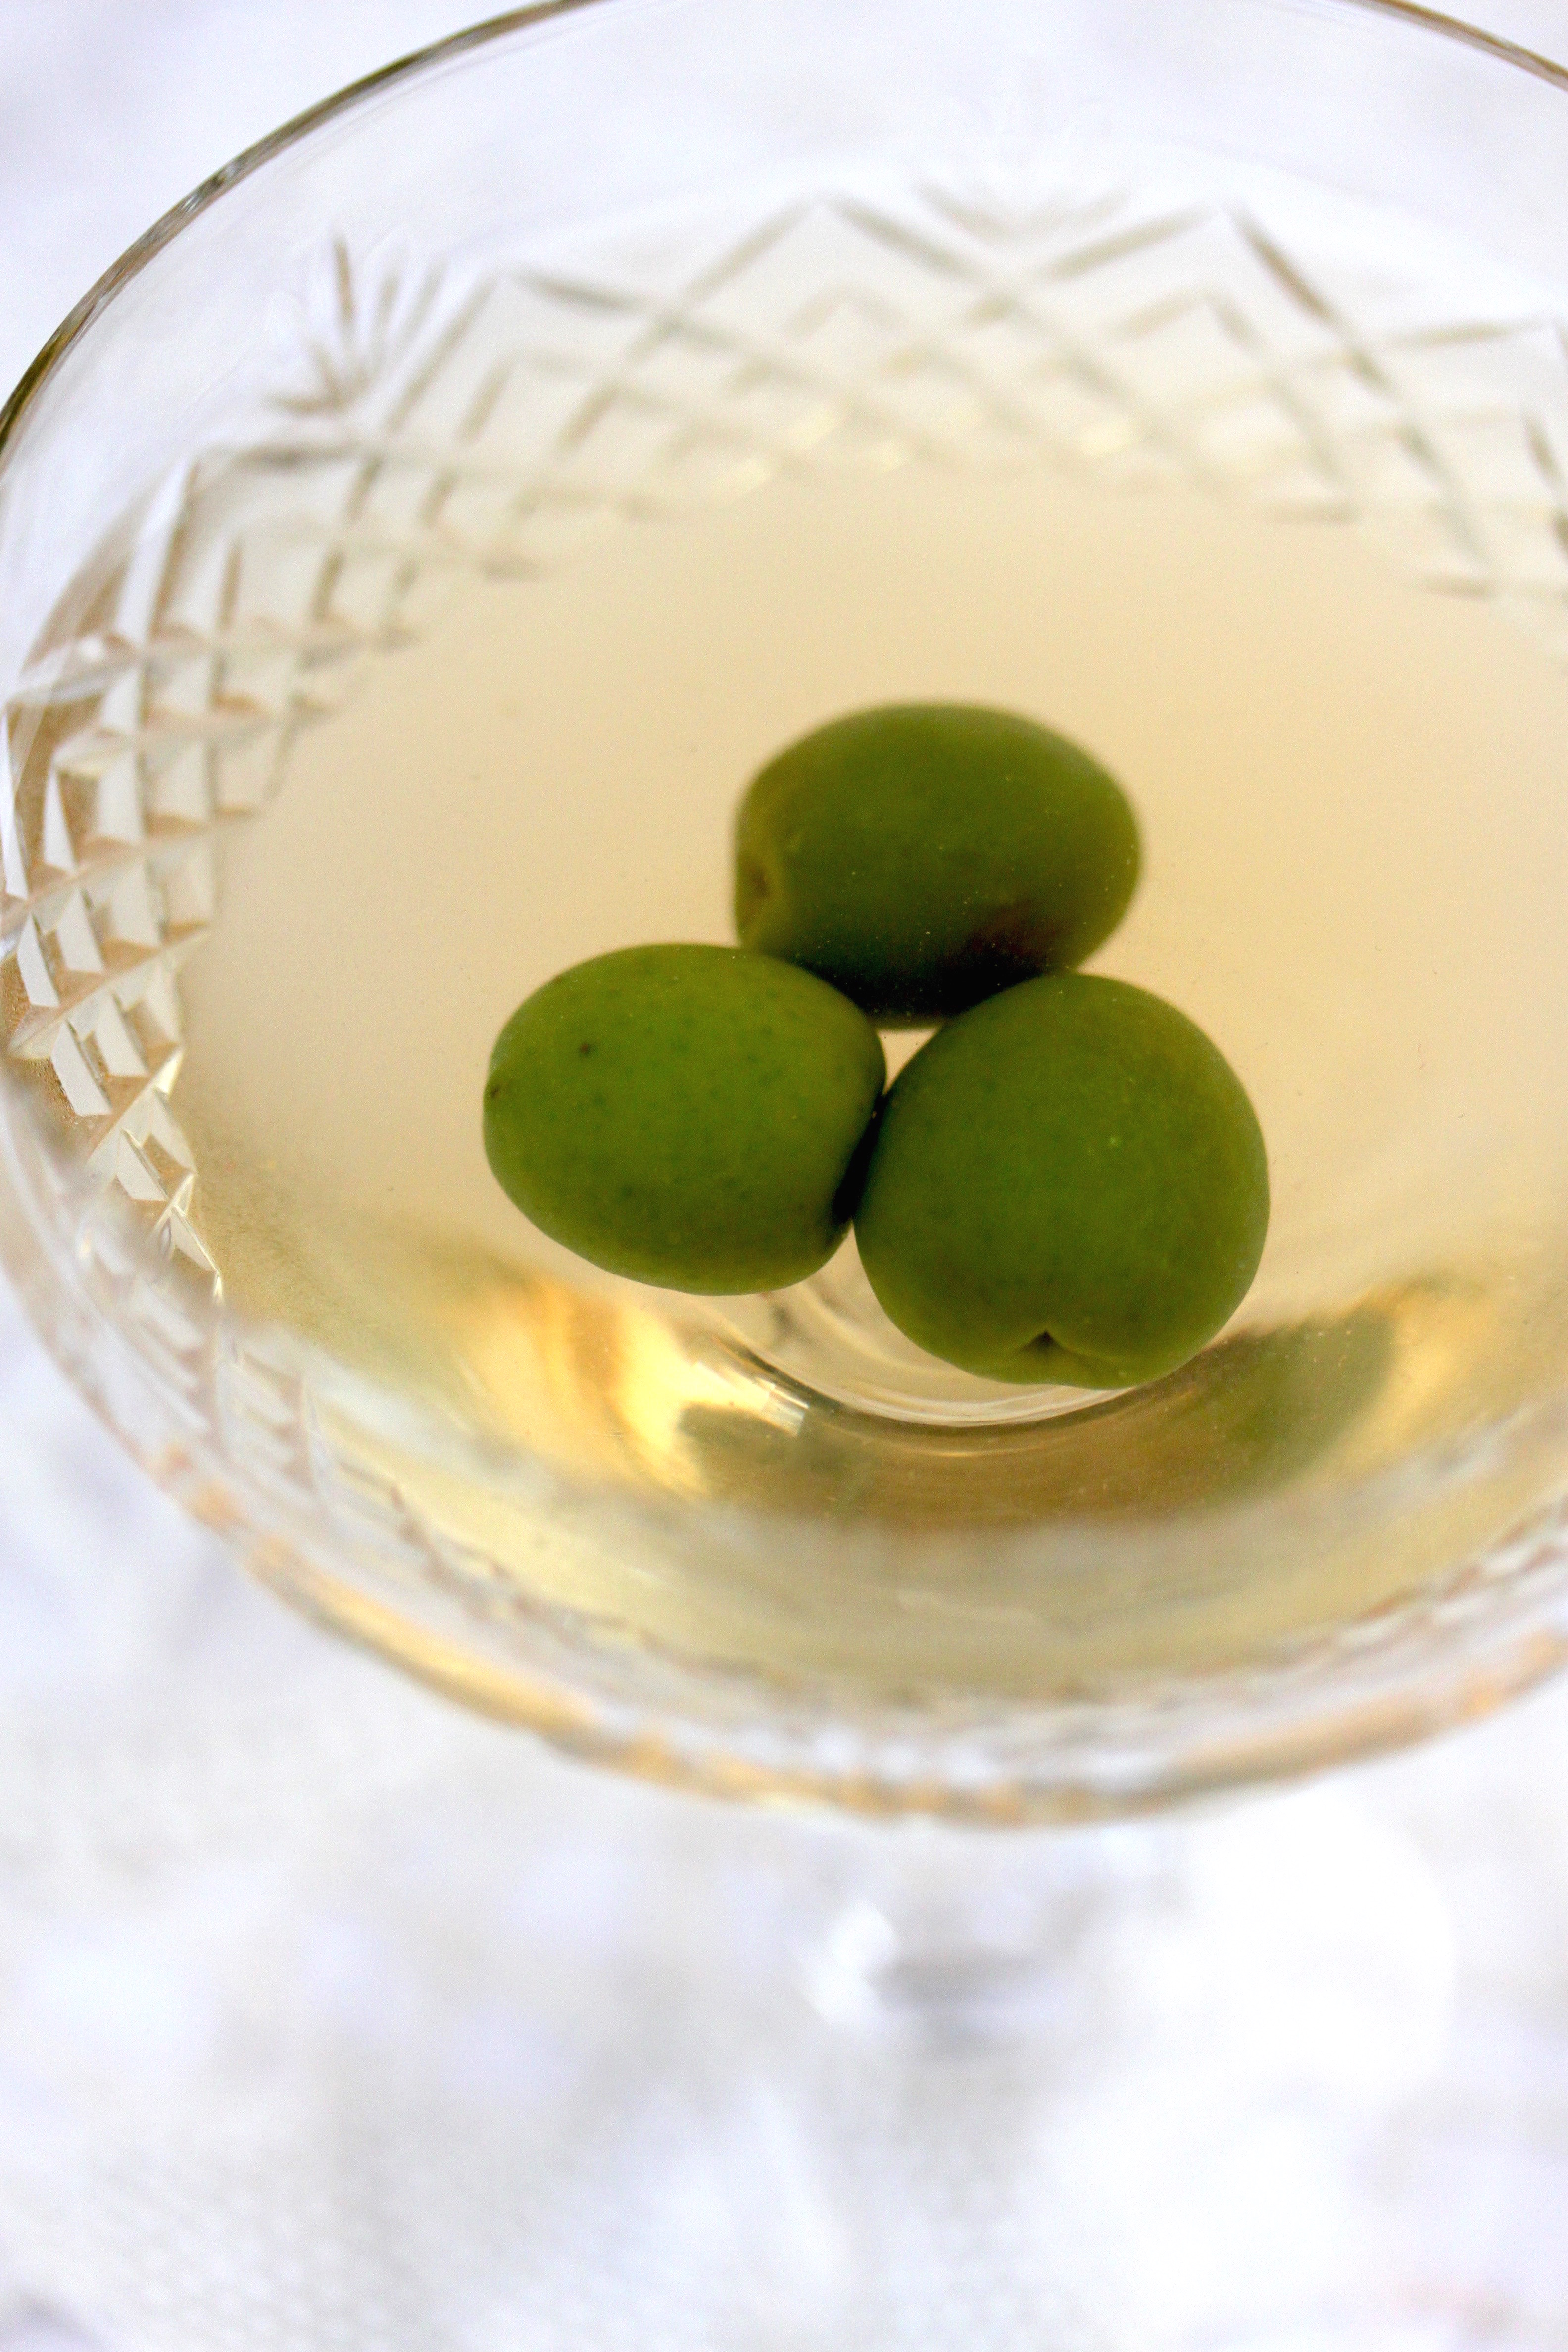
burnt toast

Mulled Winey Goodness

mulled wine‘Tis the season my friends. Time for mulled everything. Everyone is trying to top everyone else in winging about how cold it is, but secretly they love it, because who doesn’t love a steaming mug of something spiked warming up their frozen nose hair. Warmed nose hair for everyone! We’ve had hot buttered rum before, which went down a treat – but now it’s time for the antioxidant-rich grape to take centre stage and charm our socks off.

mulled cloves

This recipe calls for the creation of a complexly spiced syrup, to which later you add some red and a few splashes of ginger wine. That way you can either store it in the fridge for a few weeks, use half, or have it all straight away. This method also ensures that most of the alcohol is still present by the time of serving. None of this boiling-wine-for-two-hours business. And honestly? Most bars, no matter how craft and boutique and amazing they are, their mulled wine won’t be as good as this. Promise.

mulled orange

Delicious Mulled Wine

via the Guardian

This will make about 12 servings. If you aren’t up for cracking open two bottles of red because you’re a smallish group, make the syrup and only use half, combined with half of the rest of the ingredients. The syrup will last for a few weeks in a jar in the fridge.

2 oranges, washed
1 lemon, peel only
150g raw sugar
5 cloves, plus extra for garnish
5 cardamom pods, bruised
1 cinnamon stick
A pinch of freshly grated nutmeg
2 bottles of fruity full-bodied red wine – Shiraz-Cabernet for me please
150ml ginger wine

Remove the peel from one orange using a vegetable peeler, then squeeze out the juice. Add both to a big saucepan along with the lemon peel, the sugar and the spices. Add a few small glugs of wine, enough to cover the sugar, and let it simmer over low heat, stirring occasionally, for about 10 minutes. You should be left with a thick syrup. If I have the time I like to let it sit for a bit to let the flavours meld.

If you’re keen on doing some shmancy decorating, get the remaining orange and the remaining cloves, and make a few (as many guests as you have)vertical clove lines down the side of the orange. slice it into segments  and voilà,  your garnish is complete.

Once you’re ready to serve, add the rest of the red wine as well as the ginger wine, and gently heat the mixture until hot. Ladle into cups and squeeze an orange segment onto the edge of each. Yum!


Advertisement

Beetroot Relish and Dilled Sour Cream Poppadom Bites

poppadoms and trimmings

Autumn is such a beautiful time of year. The mornings surprise you with their icy presence, the tips of the trees are starting to turn golden, and the fruit trees in the neighbours’ gardens are exploding with a bounty of ripe goods. Soup season has well and truly arrived. While the jumpers have begun to reconquer their place in the cupboard, our daily tea consumption has doubled. Root vegetables are waving to us warmly at the supermarket as we gently bundle them up and take them home to create a dish of filling comfort.

Growing up in Bern, soup was an ever-popular staple over the colder months. At my dad’s we had a recurring list of menus to which we’d fall back on, including my stepmum’s legendary Bircher Müesli, Gschweuti, which is basically boiled potatoes served with a selection of toppings, apple tart, and at the time my little sister’s favourite, Riz Casimir, rice served with tinned fruit and tofu in a mild curry sauce. Another favourite, but slightly more rare guest on our dinner table, was borscht. I loved the almost ceremonial way the sour cream was dolloped onto the steaming burgundy soup, how you had to give it a good scattering of chopped dill fronds before gently scooping it up with a spoon, all the while trying not to disturb the stunning contrast of the beautiful colours.

So there I was the other day, daydreaming about finger food (yet again), when I thought about how swell it would be if I took those earthy cold-weathery borscht components and jazzed them up into a suave little nibble. Bring on that beetroot.

These babies are best assembled shortly before entering your mouth, so I suggest you spread all the ingredients out on a table and let everyone construct their little poppadum parcels themselves.


Beetroot relish

adapted from notquitenigella 

1 medium sized beetroot

½ tsp black mustard seeds

2 Tbsp olive oil

1 small onion, finely chopped

¼ tsp ground cinnamon

1 allspice berry (dried)

pinch chili flakes

½ tsp salt

3/8 cups raw sugar

¼ cup apple cider vinegar


A few hours before you want to make this nibble, start with roasting the beetroot. Do this by preheating the oven to 180°C, wrapping the beet tightly in tin foil, and letting it roast for a few hours. It will be done when you can easily slide a knife into it. Remove from the oven and cool.

When ready to make the relish, peel and grate the beetroot on the large holed – side of a box grater and set aside. In a small saucepan, heat the mustard seeds until they begin to pop. Add the olive oil and onion, and cook until translucent. Add the rest of the ingredients and let them bubble away until almost all of the liquid has evaporated. Make sure you stir it occasionally so it doesn’t catch. Once it’s done, remove from the heat and transfer to a jar. Let it cool down before you serve it. Why? Because the poppadums soften a lot quicker with heat, and we don’t want that.

Any leftover relish will keep in your fridge for at least a week.


To serve

1 packet small poppadums

200 ml sour cream (use light, full-fat or even Greek yoghurt. Just none of that non-fat stuff.)

1 bunch dill, leaves picked and finely chopped


Pop the poppadums in the microwave ( 30 sec – 1 min on high). Stir up the sour cream and mix it with the dill. Get your relish out. Once you’re ready to assemble and immediately eat these cuties, grab a poppadum, top it with some relish and  some dill sour cream. Crunch. Repeat.

Vegetarian Harira with Date and Almond Couscous

harira

I feel like it’s high time I give you guys something sweet for you to sink your teeth into, but for some reason it’s the savouries that have captured me and taken me on a trip to enthusiasmville, and I must say I quite like it.

Up next is a soup I had forgotten about for more than two years, which is bordering on criminal because it truly is a beautiful soup. Harira is one of those exotically seductive yet immensely comforting soups, flashy enough to serve as a special dinner but also perfect for a midweek meal. To make up for the lack of lamb in this vego version, I’ve added a few chopped up dried porcini mushrooms. I’ve also replaced celery, not because I have split feelings about it, but because I think that parsley stalks have an incredibly complex flavour, which cooked along in the soup do a fabulous job at adding that dynamic that usually le celery is responsible for. The medley of spices work spiffingly with the vibrant tomatoey broth, and is made even better by the accompaniment of the sweet buttery almond-flecked couscous. The soup will taste better the next day, as most soups do. But even a few hours after you’ve cooked it will do if that’s all the time you’ve got.

And yes I have a thing for shooting food in tiny (blue) dishes. And no, that is not a serving size I would ever dare to serve someone, let alone myself.

Vegetarian Harira with Date and Almond Couscous

Serves 4

4 slices dried porcini mushroom, very finely shopped

3-4 Tbsp olive oil

1 large onion, finely chopped

1 carrot, finely chopped

3 cloves garlic, chopped

1 cinnamon quill

1 tsp each of ground turmeric, ginger, cumin and paprika

1 pinch saffron

the stalks of half a bunch of parsley, tied in a knot

1 large red capsicum, finely chopped

400g tin chopped tomatoes

800ml stock

1 can chickpeas, half of them crushed with a fork

splash of soy sauce, salt

¼ tsp chilli flakes

half a bunch parsley, leaves finely chopped

half a bunch coriander, leaves picked

Place the chopped porcini mushrooms in a small bowl and cover with boiling water. Set aside.

In a large pot, heat the olive oil and add the onion and carrot. Fry until softened. Add the garlic and the spices, and stir until fragrant. Add the soaked mushrooms with their liquid, the capsicum, parsley stalks, capsicum, chopped tomatoes and the stock, and bring to the boil. Let it cook until all of the vegetables are soft, about 20 minutes. Add the chickpeas and soy sauce and season to taste with the salt and chilli flakes. When ready to serve, ladle into bowls and top with the parsley and coriander. Serve with the couscous (below).

almond and date couscous

Almond and Date Couscous

Serves 4

1 big nob of butter

1 fat garlic clove, finely chopped

1 cup / 190g couscous

1/2 tsp cinnamon, plus more to serve

1 cup /250ml boiling vegetable stock

10 dates, chopped into tiny cubes

1/3 cup /40g slivered almonds, toasted

In a small pan, melt the butter and add the garlic. Once it starts to go golden, remove from the heat and stir in the couscous and cinnamon. Pour over the boiling veggie stock and cover for about 5 minutes until completely absorbed. Fluff with a fork and stir through the chopped dates. Divide the couscous amongst serving dishes and top with the toasted almonds.

Creamy Zucchini Linguine

creamy zucchini linguine

It’s time for some more pasta I think. Melbourne, in its cheeky European-esque manner, has decided to have a good cry on all the plants and a few bits of stray washing outside today. It’s a good day for staying inside, drinking tea and making lists.

Pasta is rarely something I cook for guests, because I think they deserve more of an effort than that. But as a homey dinner for one, this is spot on. There’s something so inherently comforting about a bowl of pasta that for once isn’t laced with pesto or marinara, something cheesy and decadent but with still enough of a vegetable percentage for you to hi-five your conscience for getting at least one fifth of your five a day.

The combination of zucchini, garlic, thyme and dairy is one you’ve come across before here. If you by some chance are in possession of too many zucchinis, make both recipes.


Creamy Zucchini Linguine

Serves 4, with salad or something else to accompany it – can be halved or quartered to suit your needs


400g linguine, or whatever pasta you favour

3 Tbsp olive oil

4 small firm zucchini, diced into 1 cm cubes

1 tsp fresh thyme, leaves picked, chopped

2 fat garlic cloves, finely chopped

250ml cream

1 splash soy sauce, because umami, obviously

salt to taste

90g / 1 cup freshly grated parmesan

chilli flakes


Bring a big pot of water to boil and add enough salt to make it taste like the sea. Add your linguine and cook for as long as the packet instructions say, stirring occasionally to prevent the pasta from sticking.

In the meantime, make the sauce. Heat the olive oil in a large fry pan and add the zucchini and the thyme. Fry the cubes over high heat until golden and cooked but still holding their shape. Add the garlic and  stir for another minute, before adding the cream, soy sauce, salt and ¾ of the parmesan. Set aside.

Pour your pasta into a colander, give it a good shake, and then add it to the sauce in the fry pan. Give everything a  stir and divide amongst four plates. Top with the rest of the parmesan and a few chili flakes.


PS: Feel free to add a whole 500g packet of pasta here. I just like a higher sauce to pasta ratio.

Quinoa Tabbouli with Feta, Almonds and Dates

tabbouli

“Another salad with feta eh? That’s so imaginative of you”. Ja, that’s me! If you knew how rarely I actually sat down and ate a proper salad, you’d be throwing feta at me by the bucketful ok? If I’m going to have a salad that’s worth my while, it’s got to be substantial, and if it’s that, it’ll probably need a few yum-factors in there to make me actually want to finish it. Who eats a whole bowl of quinoa on its own anyway. Nobody that calls themselves my friend, that’s for sure.

All that aside, this salad is well and truly a pretty damn tasty one, even if you omit the feta (don’t). Tabbouli has always been in my life in some way or another, in the form of a packet mix, as a component of my salad bar lunch, or that one time we had an unforgettable meal at this incredibly authentic and charming restaurant in the heart of a million little windy streets in Cairo.

In my hope to make it  more of a main meal type thing, sturdy enough to be packed away as a work lunch, and happy enough to sit in the fridge for a few days without getting grumpy at me or losing its flavour, I created this little thing. I’ve gone out and jazzed up the grain component with our trusty quinoa, added some cinnamon to the mix and roasted the cherry tomatoes to increase its fridge life. Throw in some almonds for crunch, some dates for added sweetness, and some feta for that hit of salty tang, and you are in for one sexy date with your lunchbox.

Tabbouli with Feta, Almonds and Dates

Serves 4


1 cup / 170g quinoa

2 cups / 500ml vegetable stock

1 tsp cinnamon

400g cherry tomatoes, halved

2 big bunches parsley, finely chopped

1 bunch mint, finely chopped

4 spring onions, finely chopped

2 lemons, juice

1/4 cup / 60ml olive oil

salt

100g Danish feta, crumbled

8 dates, finely chopped

1/2 cup / 60g slivered almonds, toasted


First, combine the quinoa, stock and cinnamon in a small saucepan. Cook it on a small flame, covered, until it’s done. Remove from the heat and cool completely.

Meanwhile, preheat the oven to 180°C. Line a baking sheet with baking paper and lay out the halved cherry tomatoes on it. Sprinkle them with a little salt and let them relax in the oven for about 20 minutes or until they start going wrinkly and have reduced in size. Remove and let cool.

In a large bowl combine the chopped parsley, mint, spring onion and quinoa. Add the lemon juice, olive oil and as much salt as you think is necessary.

When you’re ready to serve, scoop out a nice amount onto a plate and top with some of the cherry tomatoes, some crumbled feta, the chopped dates, and a sprinkling of the toasted almonds.


The salad will keep well in the fridge for at least 3 days. To ensure complete satisfaction every time you eat it, keep all the components separate in the fridge.

Cheesy Garlicky Flatbread

cheesy garlicky flatbread

You know what’s better than garlic bread? Nothing obviously, I hear you say. You’re wrong my friend. You know all those times you ordered garlic bread to accompany your sinfully satisfying take-away pizza, and almost without a doubt, the first bite into that scalding puff of steamy bread, your inner garlic demon chucks his garlic trident into a corner and turns his back to you. Because all you really have there is (not enough, never enough) molten margarine that was placed in the vicinity of a picture of garlic. WHERE IS THE GARLIC DUDE. But you eat it anyway, because you’re a respectful human being.

Homemade garlic bread is a whole other thing. But then so is cheesy garlicky flatbread. The topping on this beauty makes up for the (never enough) butter that ceases to exist as soon as your crusty garlic baguette is hot enough to remove from the oven. This garlicky cheesy flatbread has cheese and sour cream to accompany that deliciously enticing bite of (the absolute perfect amount of) garlic. And there’s some spring onion for added prettiness.

This is one of the best most possible things you can serve your friends while you figure out what next to turn into food before you pass out from hunger. Its tasty carby goodness hits that spot with a triple hi-five.

You might as well do it this Friday.


Cheesy Garlicky Flatbread

This is more an instructions list of how to assemble. Feel free to tweak to satisfy your needs.

As many rounds of flatbread (25-30 cm in diameter) as you think will be needed (2 or more for a group of 4 as an entree)

Per flatbread you will need:

3 heaped Tbsp sour cream (full-fat please)

1/2 tsp vegetable stock granules

2 garlic cloves, finely chopped

1/3 cup / 60g grated cheddar cheese, or anything that melts well and isn’t too strong in flavour

1 spring onion, finely sliced


Preheat your oven to 220°C. Spread the sour cream evenly over the flatbread. Be sure to be generous, as some of it will be soaked up by the bread as it bakes, but, not too much, or else it’ll slide right off when you go to pick up a slice. Sprinkle the stock granules evenly over the top. You can use whatever type of salty component you like, just make sure you adjust accordingly. Sprinkle the garlic evenly over that, followed by the cheese, and then the spring onion. Transfer to a baking tray and bake for 0-15 minutes or until the cheese has melted and the edges are taking on colour. Remove from the oven and cut into pieces. Share with friends.

Zucchini and Onion Fritters

zucchini and onion fritters

Yay it’s fritter time! One of my very favourite form of food is finger food. It’s so easy and casual while still being completely alluring – a little nibble here, a crumb there, maybe even with a drizzle of this, or a scoop of that. There are few things more satisfying than sharing a few plates of delightful nibblies with your favourite humans, I think we can agree on that.

This is such an easy little number to whip up. If you have onions, zucchini and chickpea flour, you’re most of the way there. The rest is just improvisation and decoration.

Serve them with both a sweet chutney and a tangy yoghurt sauce for a bit of fun and contrast.

While you’re at it, you might as well make some samosas to accompany them, or maybe even some herby spinach and cheese triangles.


Zucchini and Onion Fritters

Inspired by The Tiffin Box


2 large firm zucchini (700g)

1 tsp salt, plus more to taste

1 large red onion, quartered, then finely sliced

½ bunch coriander, leaves picked and reserved for the yoghurt, stems finely chopped

1 tsp ground coriander

1 tsp ground cumin

1 tsp whole cumin seeds

½ tsp turmeric

freshly ground black pepper

½ tsp baking powder

1 ½ cups chickpea flour

½ cup water

oil for deep/shallow frying


Coriander Yoghurt

250ml plain Greek yoghurt

2 Tbsp lemon juice

2 Tbsp water

1 small garlic clove, finely chopped

the leftover leaves from the coriander from above, finely chopped

1/3 tsp salt


Date chutney, to serve


Grate the zucchini on the big holes of a grater. Transfer to a colander, and sprinkle over the salt. Give everything a good squish, then let it sit for 15 minutes or so. You can either wait longer or not at all – the point is, we want to get as much liquid out of the zucchini as possible. Get back to your colander and smoosh the zucchini around, trying to squeeze all that liquid out. When you find there is simply no more liquid left, and you have zucchini shreds of about half the volume you did before, dump them into a large bowl. Add the onion, coriander stems, spices, baking powder, chickpea flour and water, and give it a good stir. Give it a little taste, because it might need more seasoning. If so, add extra salt. The mixture shouldn’t be too wet – it should just hold together nicely.

Preheat your oven to 150°C. While you’re frying your fritters, you can keep the already fried ones warm in the oven, so when you serve them, they’ll all be the same temperature.

Heat the oil in a large frying pan and drop in little spoonfuls of mixture. Once they’re golden on one side, flip them over and finish the other side. Let the cooked fritters rest on a bed of kitchen paper while you continue with the rest of the mixture.

For the yoghurt, combine all ingredients in a bowl. Serve with the fritters and the date chutney.

Date Chutney

date chutneyMy last memory of making this chutney was from about 5 years ago, before I decided to pack my bags to whiz around half the globe to go live with wallabies and have tea parties with huntsman spiders. Back then, amidst the alps and the rivers of chocolate, when I was slowly but steadily cooking myself into a frenzy and coming to the realisation that hobbies really couldn’t get much better than this. One of my favourite places to eat, and I know I’m not alone, is a delightful vegetarian restaurant called Tibits, in the heart of Bern, situated enticingly in front of the train station. Possibly to target starved vegetarians on their way to work, on their way back from work, or everyone else who likes delicious food. The food is presented buffet-style (drool), ranging from curries and stir-frys to salads and delicious crusty bread rolls, and a tiny section of chutneys and condiments. I hold my head high without shame when I say that at least 1/5th of my plate would be dedicated to that date chutney they had there. Date chutney rocks. And so naturally I had to have the recipe.

Have you ever heard of Hiltl? It holds a record for being the oldest continuously open veggie restaurant in the world. Where will you find it? In Zürich. It is the mother of Tibits as well as of a few wonderful cookbooks, in which you will find said chutney. If you find yourself in Switzerland at the moment, do yourself a favour and go have some food at one of their establishments. If not, then all I can do is offer you my version of their recipe, which really, is still a pretty good deal.

If you’re having trouble coming up with ideas for using this chutney, let me help. Number one, serve it with zucchini and onion fritters and some coriander yoghurt. That recipe will follow shortly, promise. It’s delicious with pretty much every other Indian dish, especially with dhal and poppadoms, or spread into a toastie with some melty cheese. Get the idea? good.


Date Chutney

Adapted from one of the Hiltl cookbooks

Makes about 1 ½ cups


1 large onion, finely chopped

2-3 Tbsp vegetable oil

2 cm fresh ginger, finely grated

1 tsp ground cumin

big pinch chili flakes

2 Tbsp dark brown sugar

1 tsp tamarind puree (if you only have concentrate, start with ¼ tsp and adjust to taste)

100g dates, finely chopped

2 Tbsp tomato paste

½ tsp salt

200ml water


Fry the onion in the oil until softened and starting to caramelize. Add the ginger, cumin and chili flakes, and stir for about one minute. Add the sugar, tamarind puree, dates, tomato paste and salt, and top up with the water. Give everything a good stir and let it bubble away for about 5 minutes, or until the dates have broken down and the mixture has thickened. Remove from the heat and let it cool for a bit, before transferring to a jar.

Will keep in the fridge for about 2 weeks.


The Earl of Grey

the earl of grey

Most of us seem to associate a cup of tea with grandparents – a doily or two thrown in there with the shortbread biscuits, the teapot shining with all its glory in the middle of the table, waiting to be poured. Tea is the bomb. I have two wonderful grandmothers, one of them, Grandma, lives about an hour out from where I live in Melbourne. Every one of my weekly visits starts with a cup of tea in the living room – hers very weak with a splash of cold water (I know. But she has many other fabulous assets), mine with milk, sometimes with or without sugar, depending on the biscuit situation. The two of us sip and exchange our news of that past week, before deciding what else we have in mind for the next few hours. I love my Grandma days.

My memory of tea with Omi reaches back a bunch of years, back to Switzerland, to when I was small, but still the tallest of my class, with white-blonde hair and an obsession with dogs. Every once in a while I’d stay the weekend at my grandparents’ place, at their wooden chalet with the red geraniums, nestled at the foot of a forest. Giesenstein is basically a hill with a few farms sprinkled about, an only child’s paradise, where you could pick cherries during your afternoon walks with Omi and Opa in the summer, play with the tadpoles in the pond in their front yard, or watch TV. I may have mentioned before that I was a TV-less child growing up, which was great I might add, but which also made me appreciate TV and its many wondrous animal documentaries all the more. I truly loved breakfast at their place. Omi would already be awake down in the kitchen, singing to herself, setting the table for me. I’d pad down the stairs and sit down in my chair, where I’d select which type of jam I wanted on my slice of freshly buttered bread. In her sweet Austrian accent Omi would then always ask me how I would like my tea, with milk or with lemon, and I’d almost always request lemon. You know why? Because when you poured the lemon juice into the tea, it would change from black to golden caramel. Magic. And which little girl doesn’t like magic? A few lumps of sugar and then we were in business.

This cocktail recipe is inspired by Omi’s breakfast tea. It’s deliciously fresh and a slight bit posh. Earl grey takes the place of black tea and is paired with dash of lemon, accompanied by vanilla vodka and gin, because earl grey and gin are good friends, and a squeeze of orange rind to complement that seductive bergamot flavour.


The Earl of Grey

Serves one


For the earl grey syrup:

1 tsp earl grey leaves

½ cup / 125ml boiling water

½ cup / 220g white sugar


30 ml earl grey syrup

30 ml fresh lemon juice

30 ml vanilla vodka

30 ml gin

ice

a thin sliver of orange peel


Get a tea sieve or whatever handy contraption you own, place the tealeaves inside. You could use a teabag here of course, but if you’re going to all this trouble, you might as well go the whole way. Plus tea from tealeaves is a million times better. If you haven’t already, it’s time you converted, trust me. Place the sieve into a small cup, and add the boiling water. Let it sit for about 3 minutes. Remove the sieve and pour the tea into a small saucepan. Add the sugar and bring to the boil, letting it simmer until thickened slightly. Transfer to a jar and let it cool.

Once you’re ready to cocktail, combine the earl grey syrup, lemon juice, vodka, gin, and a few cubes of ice in a cocktail shaker or a jar and give it a good shake. Find your prettiest teacup, fill it up with ice cubes and pour over your Earl of Grey. To finish off, squeeze the orange rind over the top of the drink before dropping it in and giving it a little swirl.


Sun-dried Tomato and Mushroom Polenta Hot Dogs

sun-dried tomato and mushroom hot dogs

Have you ever felt frustrated by the overpriced mediocreness of those tubes of biodynamic free range soy which, in the occasion of a barbecue, to which you are invited, being the only vegetarian, you are forced to procure, because you do not just want to be limited to boiled sweetcorn and grilled zucchini. You want to feel the fulness that only the combination of protein and carbs can give you. So you buy them anyway, but still feel like you’re not part of the mob, because obviously you’re missing out on what is the whole point of having a fire: Le meat. Do you? Ha I don’t. Not anymore. I suffered for years my friend, so  I do know your pain. However I feel as  soon as I started to finally become cool (e.g. joining the carnivores), cautiously, but evermore enthusiastically exploring what that world of meat had to offer, vegetarianism had started to become the new cool. Such a trendsetter I was, way way ahead of my time. What use was it to me now.

I kid you, it’s super helpful. I still predominantly eat vegetarian food. It’s fun, it’s delicious, it’s easy, but it’s also  a challenge. And I love challenges. We will never have an equal substitute for meat, because that would defy the point of not eating it, and it would be insulting to the deliciousness that meat has to offer.

What I present you is a delicious alternative to the hot dog. It is jam-packed with umami flavours, a beautiful marriage of sun-dried tomatoes, caramelised mushrooms, a hint of smoked paprika, a dash or red wine and a scattering of parmesan. And when you thought it couldn’t get any better, I sneakily add a handful ground almonds to boost the protein content. These hot dogs aren’t an alternative. They’re their own star. Go forth my vegetarian and non vegetarian friends, and enjoy the tastiness which is the incredible polenta hot dog.


Sun-dried Tomato and Mushroom Polenta Hot Dogs

This makes a bit more than a liter of mixture, which will fill one large baking tray, which can be sliced into 18+ rectangle hot dogs.


A few tbsp olive oil

2 onions, finely chopped

a drizzle of golden syrup, honey or a sprinkle of sugar

10 button mushrooms, finely chopped

3 garlic cloves, finely chopped

1 tsp chopped rosemary

1 tsp smoked paprika

freshly ground black pepper

2 Tbsp soy sauce


100ml red wine

900ml water

vegetable stock powder

1 cup / 160g fine polenta

50g butter, cubed

1 cup / 100g finely grated parmesan cheese

½ cup / 50g ground almonds

10 sun-dried tomatoes, finely chopped

Heat the oil in a large fry pan and add the onions. Stir occasionally until starting to turn brown. Add the golden syrup to speed up the caramelisation. Once you’re happy with the colour, add the mushrooms, garlic, rosemary, paprika and black pepper, and cook, stirring, until it starts to smell delicious and the mushrooms seem cooked through. Add the soy sauce, stir a few more times, then take off the heat.

Heat the wine and water in a large saucepan and bring to the boil. Add the veggie stock powder (up to you how much – you can always add more right at the end), and stir in the polenta. Keep stirring until it goes thick. Remove from the heat and add the butter, cheese and almonds. Once that’s nicely incorporated, add the sun-dried tomatoes and the mushroom mixture. Line a baking tray with baking paper and spread the mixture out evenly. Let it cool out completely, either at room temperature or in the fridge to speed things up, and cut into desired length/shape.

At this stage you can pack a few away into a plastic bag and find a nice spot in the freezer for them. Because really, you’re not going to manage to eat all of them in the next few days.

When you’re ready to finish them off, preheat your oven to 200°C and bake them for 20 minutes or so until browned. Same procedure for the frozen ones, although they might need to be in there for a bit longer. I found they hold their shape best with this method. You can also fry them, but make sure you use enough oil, because they tend to stick. Serve with hot dog – friendly condiments.

%d bloggers like this: